Giving a room a fresh coat of paint is one of the most satisfying DIY projects you can tackle. The secret isn't just in the brush strokes, but in a three-part process: gathering the right tools, painstakingly prepping your surfaces, and then, finally, applying the paint with the right technique. Get these fundamentals down, and you'll end up with a durable, professional-looking finish that completely transforms your space. This guide provides a step-by-step tutorial on how to paint a room for beginners, ensuring a flawless finish whether you're in Salinas or Carmel.
Your First Step to a Perfect Paint Job
Painting a room is so much more than just slapping some color on a wall. It’s your chance to completely change the feel of your home, show off your personal style, and even boost your property's value. If you're new to this, the whole thing can seem a bit intimidating, but with the right approach, it's a totally achievable—and rewarding—project. This guide is your roadmap, whether you're updating a family home in Salinas or a coastal retreat in Carmel.
The desire to paint is universal, and it’s a skill more people are picking up. In fact, the market for painting services and supplies is huge. The house painting service market was valued at an incredible $58.2 billion in 2023 and is expected to climb to $89.4 billion by 2032. That’s a lot of people investing in a fresh look. You can dig into more of these market insights over on Dataintelo.com.
Understanding the Project Scope
Before you even think about cracking open a can of paint, you need to be realistic about the commitment. The biggest rookie mistake we see is underestimating how much time the prep work takes. The actual painting? That’s usually the quickest part of the whole job.
The secret to a perfect paint job is 90% preparation. Rushing the prep work is the single biggest mistake you can make. It absolutely guarantees a flawed finish that won't last.
To give you a better feel for the timeline, let's look at what's really involved in painting a standard room. This isn't just a weekend whim; it’s a methodical process that ensures a quality result. Planning it out helps you manage your time and keeps the project from feeling overwhelming. For homeowners everywhere, from Monterey to Pacific Grove, getting this part right is what separates a frustrating DIY mess from a stunning, professional-grade finish.
A little patience in the beginning pays off big time in the end. Here's a quick breakdown to help you visualize the process.
Painting Project At a Glance
Here is a quick overview of the time and focus required for each phase of painting a standard room.
| Phase | Primary Goal | Estimated Time (12×12 Room) | Key Focus |
|---|---|---|---|
| Setup & Prep | Protect surfaces and create a flawless canvas. | 4-6 hours | Taping, cleaning walls, patching holes. |
| Priming | Ensure even color and strong paint adhesion. | 1-2 hours | Even coverage, especially over new drywall or dark colors. |
| Painting | Apply the new color smoothly and evenly. | 2-4 hours | "Cutting in" edges and rolling the walls. |
| Cleanup | Restore the room and properly care for tools. | 1 hour | Removing tape, cleaning brushes, proper disposal. |
As you can see, the prep work is where you'll spend most of your time. Don't skimp on it—a flawless outcome depends on it.
Gathering Your Painting Arsenal
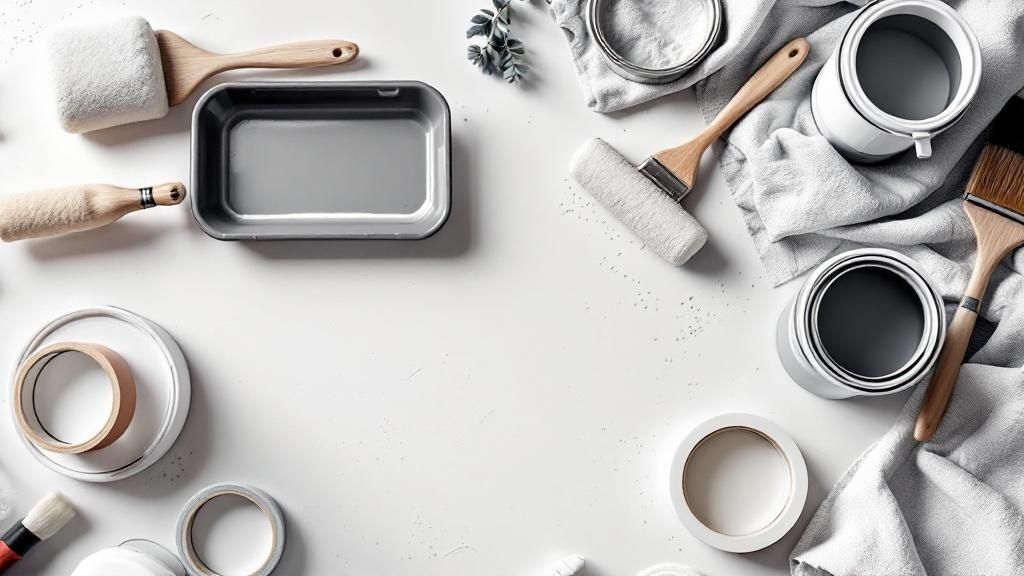
Walking into the paint aisle can feel pretty overwhelming. You’re hit with a wall of brushes, rollers, and gadgets you didn't even know existed. But here’s the truth: you only need a handful of key items to get a truly professional result.
Investing in quality tools right from the start makes a world of difference. It not only makes the job easier but delivers a finish that cheap, disposable tools simply can’t compete with. Think of it this way: a chef needs a good knife, and a painter needs a good brush. It’s the foundation of your work.
Let’s break down the essentials that will turn you from a first-timer into a confident DIY painter, ready to tackle any room in your Monterey County home.
Must-Have Brushes and Rollers
Your brush and roller are how you’ll apply the paint, but they are not one-size-fits-all. The right choice really hinges on the surface you're painting and the look you're going for.
- 2.5-Inch Angled Sash Brush: This is your detail-work hero. The angled bristles give you incredible control for "cutting in"—that's painting clean, crisp lines along ceilings, trim, and corners where a roller can't reach.
- 9-Inch Roller Frame and Covers: This is your workhorse for big, flat surfaces like walls and ceilings. The frame itself should feel sturdy, but the real star of the show is the roller cover, also called a nap.
- Roller Nap (Pile) Thickness: For the smooth interior walls common in our area, a 3/8-inch nap is perfect. If your walls have a bit of texture, stepping up to a 1/2-inch nap will give you much better coverage.
For a deeper look at how different tools and techniques come together on real-world projects, our guide on interior home painting services in Pacific Grove has some great insights.
Pro Tip: When you roll, let the tool do the work. One of the most common beginner mistakes is pressing too hard, which causes uneven coverage and those dreaded roller marks. A light, consistent touch is the secret to a flawless wall.
Essential Prep and Protection Gear
Like we said before, prep work is everything. These tools are non-negotiable for protecting your home and creating a perfect canvas for your paint.
Protective Coverings:
- Canvas Drop Cloths: A canvas drop cloth is a far better investment than plastic. It absorbs spills, is less slippery, and can be reused for years.
- Quality Painter’s Tape: A good brand like FrogTape or 3M ScotchBlue creates a tight seal that prevents paint from bleeding underneath.
Surface Preparation Tools:
- Painter’s Multi-Tool: Use it to open paint cans, scrape off loose paint, clean your roller, and spread spackle.
- Spackle and Putty Knife: You'll need these to fill in small nail holes, dings, or cracks in the drywall.
- Fine-Grit Sanding Sponge: Once your spackle is dry, sand it perfectly smooth so the repair becomes invisible under the paint.
Finally, you’ll need a sturdy paint tray and some liners to make cleanup a breeze. With these tools in hand, you have a complete kit that will see you through every step of the process—from the careful prep work in your Carmel cottage to the final, beautiful coat in a Salinas family room.
Prepping Your Room Like a Professional
Ask any professional painter what the secret to a spectacular paint job is, and you’ll hear the same thing every time: it’s 90% preparation. This is the single most critical part of the entire project.
Getting this stage right is the key to walls that look perfectly smooth, lines that are razor-sharp, and a final product that actually lasts. Rushing through the prep is a classic rookie mistake. Paint can only look as good as the surface it’s on. Let’s walk through the exact steps our teams use on projects throughout Monterey County to guarantee a perfect canvas.
This image is a great visual of what a perfectly prepped room looks like right before the first drop of paint hits the wall.
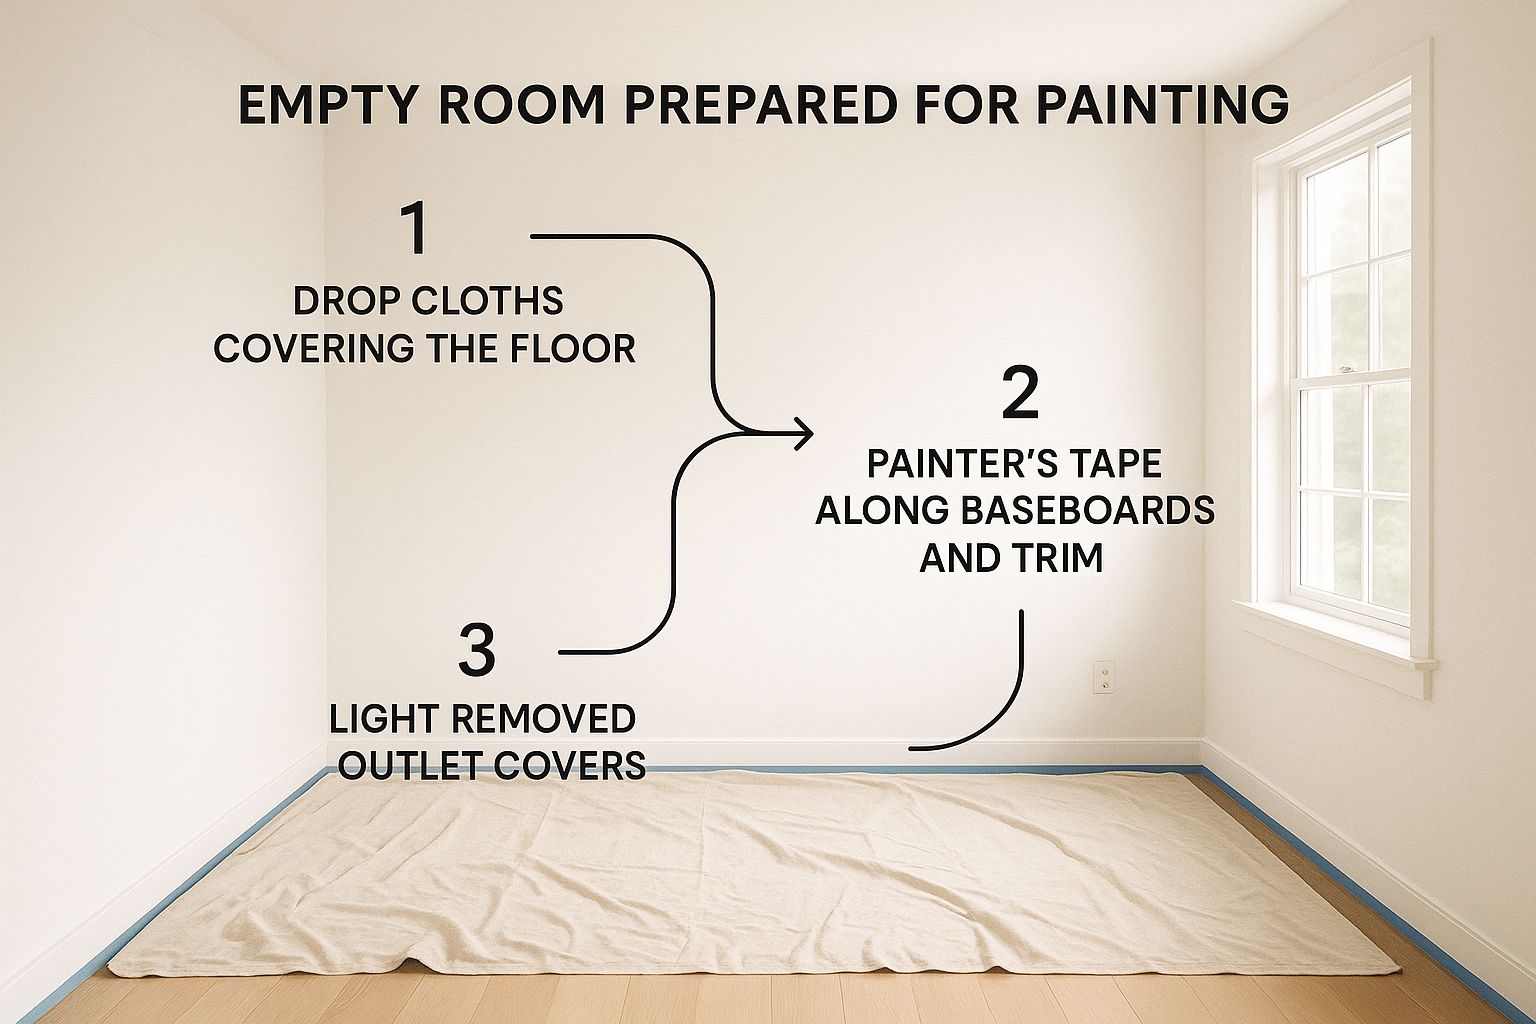
You can see how everything is either moved or protected, the trim is taped off, and the room is clean and ready to go. That’s our goal.
Protecting Your Space
First things first: you need to turn the room into a safe work zone. This is all about protecting everything you don’t want paint on. Start by moving all the furniture you can out of the room entirely.
Next, lay down canvas drop cloths to cover the entire floor. Don’t forget to remove all outlet covers, switch plates, and any light fixtures mounted on the walls. Pop the screws back into the plates or keep them all in a labeled plastic bag so nothing gets lost.
Creating a Flawless Surface
Now, it’s time to get your walls into perfect shape. Even if your walls look clean, they are covered in a thin layer of dust, cobwebs, and oils from daily life. This grime can stop the paint from sticking properly.
Give the walls a good cleaning with a simple solution of mild soap and water. Pay extra attention to high-traffic areas like around light switches. Rinse with a clean, damp sponge and let the walls dry completely.
Once everything is clean and dry, it’s time for a detailed inspection. Get up close and look for any nail holes, dents, or small cracks.
- For small nail holes: Put a dab of spackle on your finger or a flexible putty knife. Press it into the hole and scrape the surface flat.
- For larger dings or cracks: Apply spackle in a few thin layers, letting each layer dry before adding the next one. This prevents shrinking or cracking.
After the spackle has fully dried, grab a fine-grit sanding sponge and lightly sand the patched areas until they feel perfectly smooth. When you're done, wipe the walls down with a tack cloth to get rid of every last bit of sanding dust.
A professional finish is all in the details. Spending an extra hour patching and sanding is far more valuable than rushing to get paint on the walls. This meticulous work is the foundation of our professional residential interior painting services.
Taping for Crisp, Clean Lines
Taping properly is an art, but it’s one you can definitely master. This is what creates those incredibly satisfying, razor-sharp lines between your walls, ceiling, and trim.
Invest in a high-quality painter’s tape. Apply the tape in short, overlapping strips along the top edge of your baseboards, around window and door frames, and where the walls meet the ceiling.
Here’s the pro tip: as you lay the tape down, press firmly along the edge with a putty knife. This creates a super-tight seal that paint can't sneak under. Taking your time here will save you hours of frustrating touch-up work later.
Choosing Your Perfect Color and Sheen
Picking a paint color is often the most exciting part of the process, but it’s also where a little insider knowledge can save you from a huge headache. The right color and finish do more than just sit on a wall; they create the entire mood of a room.
Whether you're decorating a high-traffic family space in Salinas or a quiet, peaceful retreat in Carmel, the goal is the same: make an informed choice that creates a space you’ll be happy with for years to come.
Decoding Paint Sheens
Let's talk about sheen. Also called the finish, this simply refers to how much light the paint reflects. This decision is just as crucial as the color itself because it directly affects durability and washability.
Think of it this way: the more shine, the more durable the paint. But that same shine will also highlight every tiny bump or crack. A flatter finish is excellent at hiding flaws but won’t stand up to much scrubbing.
Expert Insight: You almost never want to use the same sheen everywhere. Ceilings look best in a flat finish. High-traffic hallways, kitchens, and kids' rooms, however, need the easy-to-clean durability of a satin or semi-gloss.
Choosing the right sheen is a game of matching the paint's properties to the room's function. This table breaks down the most common options to help you decide.
Paint Sheen Selection Guide
| Sheen | Durability | Best For | Pros | Cons |
|---|---|---|---|---|
| Flat/Matte | Low | Ceilings, low-traffic adult bedrooms | Hides imperfections beautifully, rich color depth | Difficult to clean, scuffs easily |
| Eggshell | Medium | Living rooms, dining rooms, hallways | Soft, low-sheen look; more washable than flat | Can still show some imperfections |
| Satin | High | High-traffic areas, kids' rooms, kitchens | Very durable, easy to clean, has a soft glow | Shine can highlight wall texture flaws |
| Semi-Gloss | Very High | Trim, doors, cabinets, bathrooms | Extremely durable, moisture-resistant | Very shiny, shows every flaw on the surface |
| High-Gloss | Maximum | Trim, doors, furniture (for a statement) | Toughest finish, almost glass-like | Extremely unforgiving; requires a perfect surface |
Ultimately, your lifestyle is the best guide. For a busy home with kids and pets, leaning towards satin for the walls is a smart move.
The Impact of Light on Color
Here's a piece of advice that separates the pros from the amateurs: never, ever pick a paint color from a tiny chip under the fluorescent lights of a hardware store. How a color looks in your home will change dramatically throughout the day as the light shifts.
That cozy beige can turn muddy and sad in the afternoon shade. That perfect soft gray might suddenly flash purple or blue once it’s on all four walls. This is why testing your top choices in the actual space is an absolute must.
Here’s the right way to do it:
- Get Sample Cans: Spend a few dollars on sample pots of your top 2-3 colors.
- Paint Big Swatches: Paint large squares (at least 2×2 feet) of each color right on the wall in different parts of the room.
- Live With Them: Watch the colors for at least 24-48 hours to see how they look in morning sun, evening light, and with your lamps on.
This exact process is a cornerstone of our expert paint color selection service, because it guarantees the final result is what you truly envisioned.
To Prime or Not to Prime?
The last piece of this puzzle is primer. Primer is the foundation for your paint job. It’s a special undercoat designed to seal the surface, block stains, and give your topcoat an even, uniform base to stick to.
You absolutely need to use a separate primer if you're:
- Painting over fresh, unpainted drywall.
- Making a drastic color change (like going from dark red to a light beige).
- Covering up stains from water, smoke, or markers that might bleed through.
- Painting a slick, glossy surface that new paint will have trouble gripping.
For a simple job, like repainting a light-colored wall with a similar shade, a quality paint-and-primer combo will usually do the trick.
Mastering Your Painting Technique
Alright, the prep work is done, and your perfect color is ready to go. This is the part where all that planning pays off. The secret to a professional-looking finish is being methodical and using a few trusted techniques that prevent drips, streaks, and roller marks.
For a clean, efficient job, you have to paint things in the right order. Always work from the top down. Paint the ceiling first, then the walls, and finish with the trim and baseboards. This simple strategy means any accidental drips will land on surfaces you haven't painted yet.
The Art of Cutting In
"Cutting in" is what pros call painting those clean, crisp lines where different surfaces meet. This is where a good 2.5-inch angled sash brush becomes your best friend.
A classic rookie mistake is dunking the whole brush in the paint can. Just dip the first third of the bristles in. Gently tap—don't scrape—the brush against the inside of the can to knock off the excess.
When you're painting along a trim or ceiling line, use long, steady strokes. The trick is to paint a 2-3 inch band near the edge, then go back and use the very tip of your angled brush to create that final, razor-sharp line.
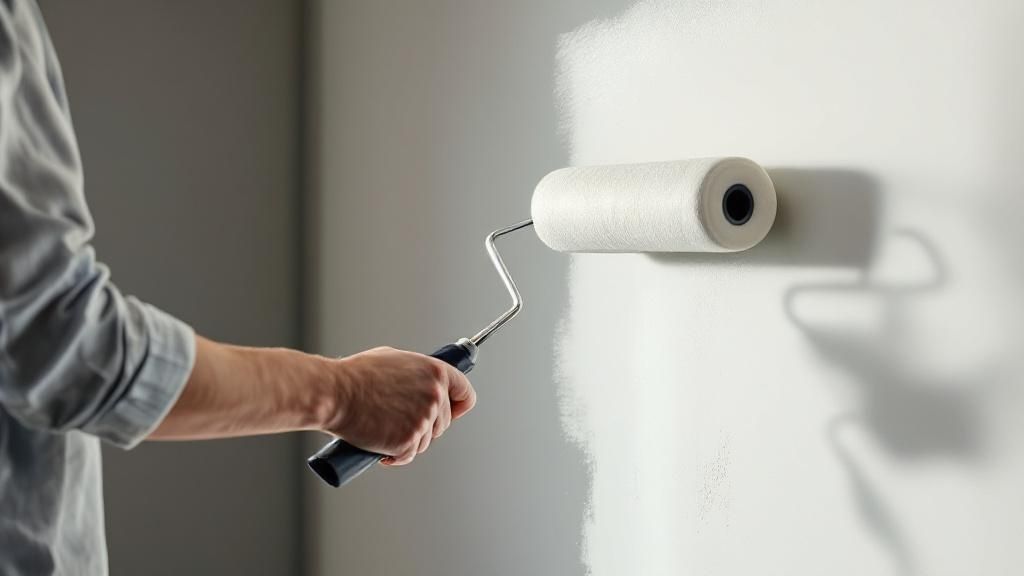
Mastering the Roller for a Flawless Finish
After you've cut in all the edges around a wall, it’s time to grab the roller. The key here is to always maintain a "wet edge." This just means you should always be rolling back into a section of paint that's still wet to avoid ugly lap marks.
Start by loading your roller evenly on the ramp of your paint tray until the nap is fully saturated but not dripping with paint.
Apply the paint to the wall in a big "W" or "N" pattern. Then, without adding more paint to the roller, gently roll over that same area with light, parallel strokes from the ceiling down to the floor. This final pass, called "laying off," is what smooths everything out.
A high-quality paint not only provides better coverage but also contains leveling agents that help smooth out brush and roller marks as it dries. Understanding what goes into a can of paint can help you appreciate why investing in quality paint is crucial for a long-lasting finish.
Why Eco-Friendly Paint Is a Smart Choice
While you're painting, you're up close and personal with the product. The global interior wall paint market was valued at around USD 15 billion in 2023, and a big driver of that growth is homeowners demanding safer options. You can learn more about these market trends.
The most important factor here is the shift to low-VOC or zero-VOC (Volatile Organic Compound) paints. VOCs are chemicals that evaporate into the air as paint dries. Opting for a low-VOC paint is a smart choice, especially for families in places like Salinas and Pacific Grove who want a healthy living space.
The Final Touches and Cleanup
The last stroke of the roller doesn't mean the job is done. The real pro finish comes from the cleanup and the care you take putting the room back together. It’s tempting to rush this part, but skipping these final steps can make all your hard work look sloppy.
This is the moment of truth, where you finally reveal those crisp, clean lines and start reclaiming your space. The key here is patience and a methodical approach.
Revealing Your Hard Work
Peeling off the painter’s tape is one of the most satisfying parts of any paint job. But timing is everything. Pull it off too soon, and you’ll have a smeared mess. Wait too long, and you risk pulling off chunks of paint with the tape.
You're looking for that sweet spot when the paint is dry to the touch but hasn’t fully cured yet, usually within an hour or two. For that perfect, razor-sharp edge, pull the tape off slowly and at a 45-degree angle away from your new paint.
Cleaning and Storing Your Tools
Good tools are an investment. Clean them right, and they'll be ready for your next project. For latex paint, a little soap and warm water is all you need.
- Brushes: Gently work soapy water through the bristles until the water runs clear. Reshape the bristles and hang the brush to dry.
- Rollers: Use your painter's multi-tool to scrape off all excess paint. Then, wash the roller cover thoroughly and stand it on its end to air dry.
Pro Tip: Don't let your leftover paint go to waste. Pour a small amount for future touch-ups into a clean glass jar with a tight-fitting lid. This keeps the main can from getting air-exposed every time you need to fix a small scuff.
Reassembling Your Room
Once the paint is fully cured, you can start putting your room back together. Rushing this step is the fastest way to get scuffs or dents on your fresh walls. Always check the paint can for specific cure times, but as a rule of thumb, wait at least 24-48 hours.
Carefully screw your outlet covers and switch plates back on and reinstall any light fixtures you removed. Then you can move your furniture back into place and finally step back to admire your beautifully transformed room.
Common Questions About Painting a Room
Kicking off a new paint project always brings a few questions to the surface. After years of hands-on work with homeowners all over Monterey County, we've heard them all. Here are some quick answers to the most common queries we get from first-time painters, pulled straight from our experience in the field.
How Many Coats of Paint Do I Really Need?
You should always plan on applying two coats of paint. No shortcuts here. Think of the first coat as the foundation—it gives you that initial coverage. But it’s the second coat that truly brings the color to life, giving you that rich, uniform, and durable finish. If you're making a dramatic color change, like going from deep navy to a light cream, you’ll definitely want a high-quality primer first.
How Long Should I Wait Between Coats?
Patience is a painter's best friend. For most latex paints, you’ll need to wait at least 2 to 4 hours between coats. But don't just guess—always double-check the paint can for the manufacturer's specific recommendation. Local conditions play a huge role, too. High humidity in coastal spots like Pacific Grove or just a cold day can easily extend that drying time.
Proper drying time isn't just a suggestion; it's critical for creating a strong chemical bond between paint layers. This ensures the final finish is durable and won't peel or chip prematurely.
Is Primer Actually Necessary?
In some situations, primer isn't just a good idea—it's absolutely essential. You must use a primer if you're working with:
- New, unsealed drywall
- Covering up dark or very vibrant colors
- Painting over slick, glossy surfaces
Those modern "paint-and-primer-in-one" products can be a good fit for simpler jobs, like repainting a light-colored, flat-finish wall in a similar shade. For a deeper dive into more project-specific questions, check out our full Legacy Painting & Renovating FAQs page.
What Is the Best Way to Avoid Roller Marks?
The secret to a flawless finish without those annoying roller marks is all in the technique. First, make sure your roller is evenly loaded with paint—not dripping wet, but not dry, either. Apply the paint in a large "W" or "N" pattern, then lightly roll back over the entire section in smooth, parallel strokes from top to bottom. This is called "laying off," and it's what gives you that smooth, professional-looking finish.
Can I Save Leftover Paint?
Yes, and you absolutely should! Having leftover paint is a lifesaver for future touch-ups. To store it properly, wipe the can's rim clean, then seal the lid on tight—using a rubber mallet helps get a snug fit. Finally, store the can upside down in a cool, dry place where it won't freeze. Storing it upside down creates an airtight seal that keeps the paint fresh.
Feeling confident, but still prefer a professional touch? The team at Legacy Painting and Renovating Inc. is here to bring your vision to life with flawless results. From interior painting in Monterey to a full Salinas home renovation, we've got you covered. Contact us today for a free, no-obligation estimate!