The secret to a paint job that looks incredible and lasts for years isn't a special brush or a secret paint formula. It's all in the prep work. This guide will walk you through how to prepare walls for painting, covering the critical sequence of cleaning, repairing, sanding, and priming for a truly professional finish.
Why Wall Prep Is the Secret to a Flawless Finish
Before you even think about prying open that can of paint, let's talk about what truly separates an amateur job from a professional one. It’s not the brand of paint or the type of roller—it’s the preparation. Skipping this stage is the biggest mistake you can make, and it’s why so many DIY projects end in disappointment.
Imagine trying to paint over a surface that’s got a thin, invisible film of dust, kitchen grease, or oils from fingerprints. That beautiful new color simply won't have a clean, stable surface to grab onto. The result? Bubbling, peeling, and chipping that can show up weeks or even months later, forcing you to do it all over again.
Seeing Your Walls Like a Pro
A professional painter doesn’t just see a flat surface; we see a canvas with a history. Every tiny nail hole, hairline crack, or subtle ding gets magnified under a fresh coat of paint, especially in the bright coastal light we get here in the Monterey Bay area.
The quality of a paint job is decided long before a brush touches the final color. A staggering 80% of a professional finish comes from meticulous prep work. Only 20% is the actual painting itself.
This foundational work is what guarantees a stunning, durable finish and makes your investment of time and money worthwhile. Proper prep also ensures your paint’s color looks true and even, without blotchy patches where the wall absorbed the paint differently. For more on how the right color can transform your space, you can learn about our expert paint color selection for your home.
What Happens When You Skip Preparation
Cutting corners on prep is like building a house on a shaky foundation. No matter how beautiful the house is, it just won't last. Here’s exactly what you’re risking:
- Poor Adhesion: Dust, dirt, and oils create a barrier between the wall and the new paint. This is the number one cause of peeling and flaking.
- Visible Imperfections: Small cracks, dents, and bumps become glaringly obvious under a fresh, uniform coat of paint.
- Blotchy or Uneven Finish: Unprimed patches or porous areas of drywall soak up paint differently, creating noticeable variations in color and sheen.
- Reduced Durability: A poorly prepped surface is far more susceptible to scuffs, stains, and damage, which dramatically shortens the life of your paint job.
Whether you're updating a family home in Salinas or a chic commercial space in Carmel, dedicating the necessary time to preparation is non-negotiable. It’s the essential first chapter in your room’s transformation story, setting the stage for a result you can be proud of for years to come.
Setting Up Your Workspace for Success
Any pro will tell you that a stunning paint job has less to do with the final brushstroke and more with what happens before the can is even opened. This initial setup isn't just about tossing a few old sheets on the floor; it's about creating a clean, safe, and efficient workspace. Taking the time here saves you from massive headaches later on.
First, clear the room as much as possible. For heavy items that must stay, move them into the center and wrap them completely in plastic sheeting. This creates a wide, clear path around the perimeter so you can move freely.
Protecting Your Floors and Fixtures
Your floor is ground zero for paint drips and splatters. We almost always use canvas drop cloths because they’re durable, absorb paint, and stay put.
Here's a tip that separates the pros from the amateurs: Don't just drape your drop cloths. Use painter's tape to secure the edges right up against the baseboards. This creates a perfect seal, stopping dust and paint from creeping underneath.
Next, turn your attention to the walls. It’s always worth the extra five minutes to remove outlet covers, switch plates, and light fixture canopies. Trying to tape around these things rarely gives you a clean line.
Mastering the Art of Masking
Getting those razor-sharp lines that scream "quality job" comes down to your tape. The right one depends on the surface and how long it needs to stick.
- Standard Blue Tape: Your workhorse for most jobs. It’s great for protecting trim, window frames, and baseboards and usually offers 14-day clean removal.
- Delicate Surface Tape: Use this light-tack tape (often purple or yellow) on freshly painted walls (cured for at least 24 hours) or wallpaper.
- Exterior Tape: This tough tape has a stronger adhesive and UV resistance to handle sun and weather on outdoor projects.
After laying down a strip of tape, run a putty knife along the edge to press it down firmly. This simple action creates a tight seal that prevents paint bleed, giving you that perfect, crisp line. This kind of organized, detailed setup is a cornerstone of providing excellent residential interior painting in Pacific Grove and our other service areas.
This focus on meticulous prep is becoming more important across the industry. The global market for wall painting services is on the rise, with homeowners expecting higher quality. To meet this demand, about 30% of painting companies are actively working to find painters skilled in advanced prep work, from multi-stage sanding to precise masking. You can read more about these market quality trends and insights.
The Critical Deep Clean Your Walls Need
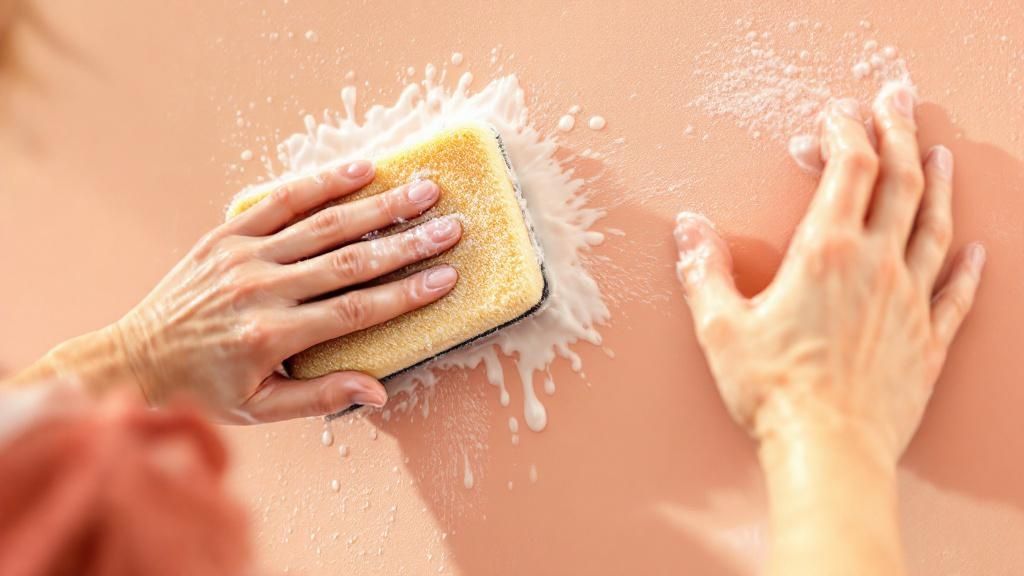
Once your space is prepped and protected, it’s time for the most make-or-break step for good paint adhesion: the deep clean. We’re talking about getting rid of years of invisible grime, dust, and airborne particles that form a barrier between the old wall and your new paint.
You’d never wax a dirty car, right? Painting a dirty wall is the exact same principle. This is a fundamental part of how to prepare walls for painting if you want a finish that lasts.
Choosing the Right Cleaning Solution
The right cleaner depends on what your walls have seen. For most living rooms, bedrooms, and hallways, a simple mix of mild dish soap and warm water is all you need.
But some rooms need more firepower. For the sticky film of cooking grease in kitchens or grime in bathrooms, you’ll need a dedicated degreaser.
Expert Insight: Many old-school painters swear by Trisodium Phosphate (TSP), but it's highly caustic. A much safer and just as effective option is a TSP substitute, which gives you the same grease-cutting power without the harsh chemicals.
Handling Mold and Mildew
Here on the Monterey Peninsula, our beautiful coastal air means mildew can be a common problem. If you see speckled patches, you must deal with them correctly before painting.
Here’s the proper way to kill it:
- Mix a Solution: Combine one part household bleach with three parts warm water.
- Apply and Wait: Put on gloves and eye protection, then use a sponge to apply the solution to the mildew spots. Let it sit for 10-15 minutes to kill the spores.
- Scrub and Rinse: Gently scrub the area with a soft brush, then rinse it completely with a clean, damp cloth.
Eliminating mildew is non-negotiable for any successful Salinas home renovation. It protects both your paint job and your home's air quality.
The Right Washing and Drying Technique
Your technique is just as important as your cleaning solution. Always wash from the bottom of the wall up to prevent clean streaks from running down a grimy wall.
Use a two-bucket system: one for your cleaning solution and one with clean rinse water. After you wash a section, use the clean water to wipe the wall again, removing any soap residue.
Finally, be patient and let the walls dry completely. This can take anywhere from 1-4 hours, depending on humidity. Don’t rush it; painting over a damp wall guarantees bubbles and failure.
Repairing Imperfections for a Seamless Surface
Perfect walls aren't found, they're made. Once the walls are clean, it's time to fix every last ding, crack, and hole. This is where real craftsmanship shines, turning a tired wall into a perfectly smooth canvas.
For tiny nail holes, small dings, or shallow scratches, a lightweight spackling compound is your best bet. It’s easy to work with, dries fast, and sands down easily.
Handling Larger Drywall Damage
For more serious damage, like the dent left by a doorknob or larger cracks, you need a heavy hitter: joint compound, also known as "mud." It’s a denser, stronger material designed for building up larger repairs in thin layers.
If you're looking at a crack wider than a credit card or a hole bigger than a quarter, you need to add structural reinforcement with drywall tape.
- Fiberglass Mesh Tape: This is great for beginners because it's self-adhesive. You just stick it over the crack and then mud right over it.
- Paper Tape: This is what the pros use for a stronger, more seamless bond. Lay down a thin bed of mud first, then press the paper tape into it.
Taping is a non-negotiable step for any quality home renovation, whether you're in a classic Salinas home or a modern Pacific Grove build.
Pro Tip: Your eyes will lie to you. Kill the overhead lights and hold a bright work light close to the wall, shining the beam across the surface. This "raking light" technique will cast long shadows, making even the slightest bumps and divots jump right out.
The Art of the Invisible Patch
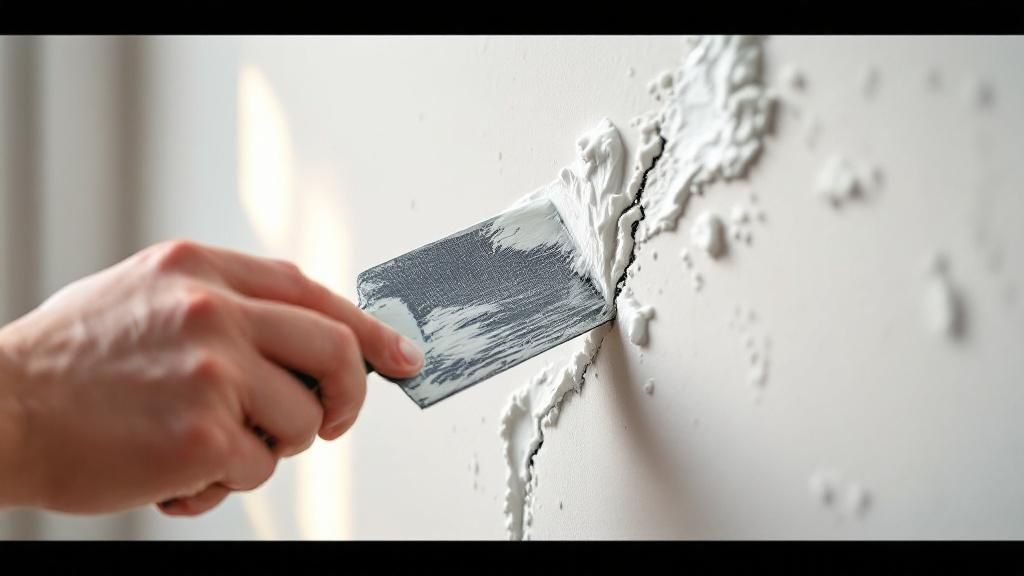
So you've filled the hole. Now, how do you make the patch completely disappear? The secret is feathering the edges. This technique involves tapering the compound from thickest at the center to nothing at the edges, creating a flawless blend.
Apply your filler, then use a flexible putty knife at a low angle to smooth the compound out past the edges of the damage. It's always better to apply two or three thin coats—letting each one dry completely—than to glob on one thick coat.
Wall Filler and Repair Compound Guide
This table compares common fillers and their best-use cases for wall preparation.
| Compound Type | Best For | Drying Time | Sanding |
|---|---|---|---|
| Lightweight Spackle | Nail holes, small dings, shallow scratches | 30 mins – 2 hours | Very Easy |
| All-Purpose Joint Compound | Larger cracks, small holes, skim coating | 12 – 24 hours | Moderate |
| Quick-Setting Compound ("Hot Mud") | Deep holes, large patches, time-sensitive jobs | 20, 45, or 90 mins | Harder (sets chemically) |
| Epoxy/Wood Filler | Damaged trim, wood repairs, high-impact areas | Varies by product | Difficult |
Choosing the right primer is just as important as the patch itself. A good primer seals the new compound and prevents the patch from showing through the topcoat.
As you can see, you have to match the product to your wall's material and condition to get proper adhesion. Proper patching and priming are the twin pillars of a professional-looking paint job. This meticulous attention to detail is the standard we bring to every one of our interior painting projects.
Sanding and Priming for Ultimate Adhesion
After cleaning and repairs, your walls are almost ready. Now we get to the two steps that are a non-negotiable insurance policy for a flawless paint job: sanding and priming.
Skipping them is the number one reason I see paint jobs fail prematurely. They are the absolute keys to making sure your new color grips the wall perfectly and looks incredible for years to come.
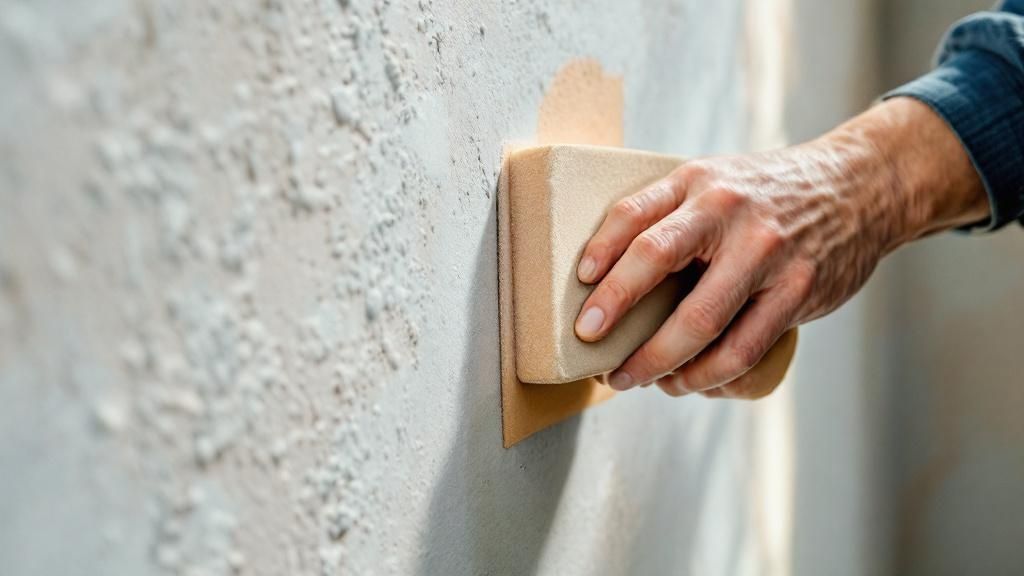
The Real Reason We Sand
Sanding isn’t just for knocking down patch jobs. Its most critical role is creating a microscopic texture across the entire wall, giving the new paint thousands of tiny edges to grab onto. This "scuff sand" dramatically improves adhesion.
Here’s what you’ll need:
- The Right Grit: For scuffing existing paint, a fine-grit paper (180 to 220-grit) is your best friend. For freshly patched areas, start with a medium-grit (120 to 150-grit) to level it, then switch to fine-grit to feather the edges.
- Your Sanding Tool: A hand-sanding block works for small touch-ups, but a pole sander is better for an entire room.
Expert Insight: After sanding, your walls will have a fine coat of dust. You must wipe this off. A damp cloth or a tack cloth is perfect for this. If you paint over that dust, you're locking in a gritty, rough texture.
The Power of a Good Primer
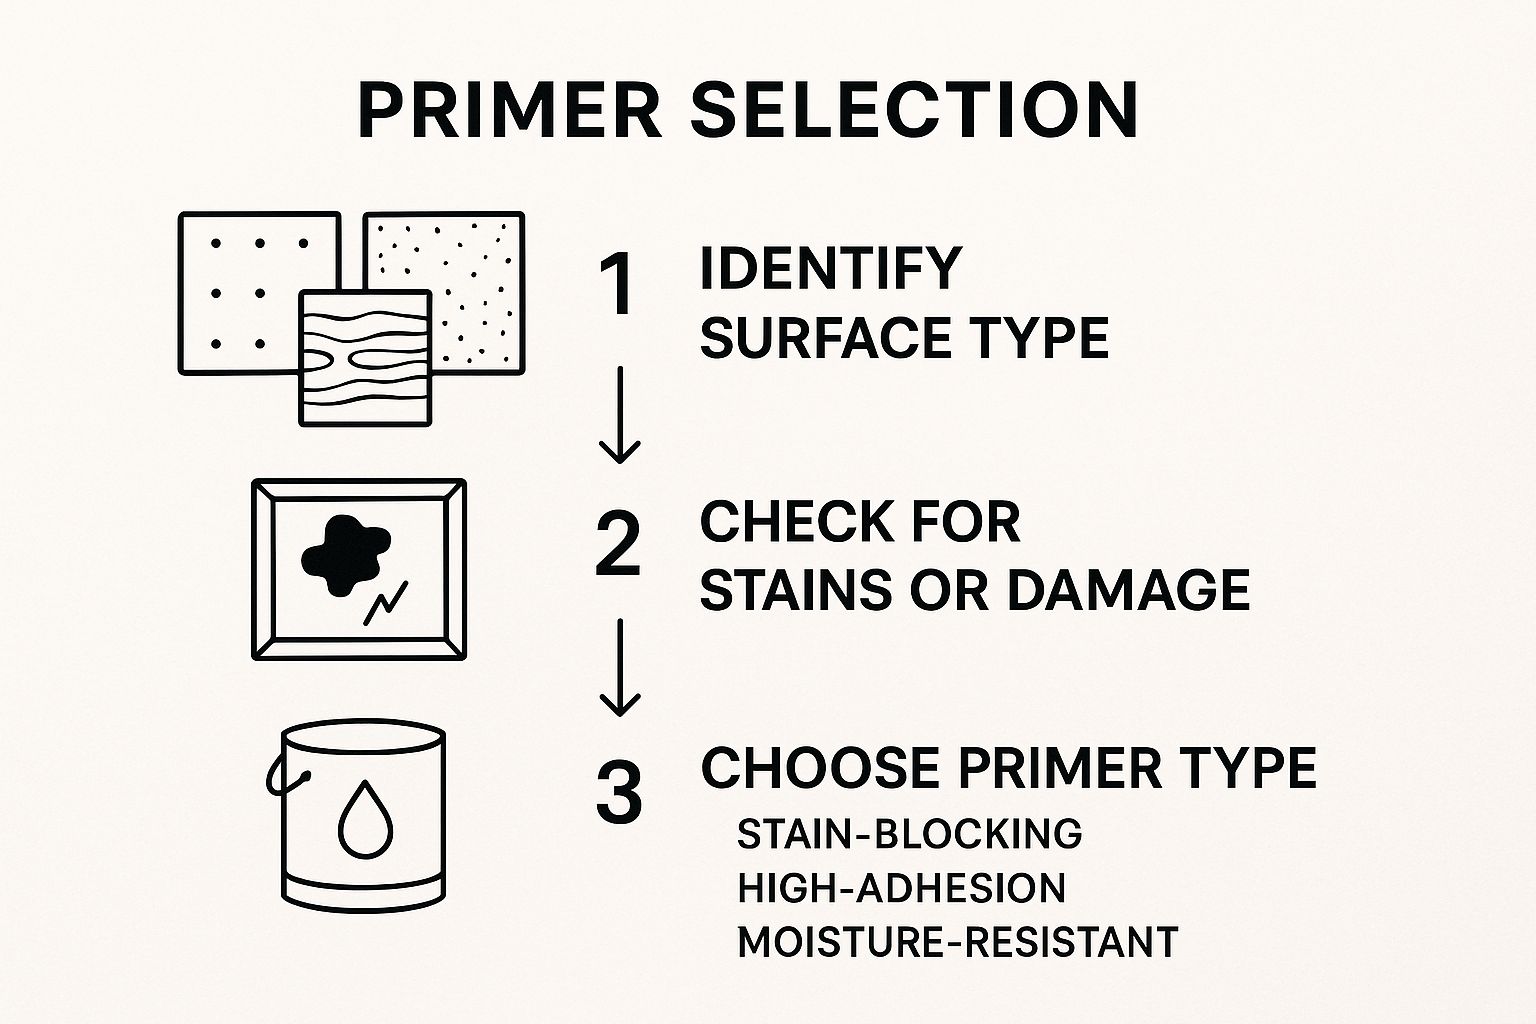
With the dust gone, it's time for priming. A quality primer is a problem-solver engineered to seal surfaces, hide stains, and create a uniform base so your topcoat looks rich and even.
The pros know this. According to research, proper surface preparation, including sanding and priming, can extend the life of a paint job by over 50%. You can learn even more about the benefits of thorough paint prep on Lick.com.
When Primer Isn't Optional
While you can sometimes get away without it on a simple repaint, primer is absolutely essential in these common scenarios:
- New or Patched Drywall: Fresh drywall mud is like a sponge. Primer seals it so the topcoat goes on evenly.
- Drastic Color Changes: Going from a dark color to a light one? A tinted primer hides the old color so you don't have to apply three or four coats of paint.
- Covering Stains: Water marks and smoke residue will bleed right through regular paint. A dedicated stain-blocking primer is the only way to lock those stains in for good.
- Painting Glossy Surfaces: Even after sanding, high-gloss paints are slick. A "bonding" primer creates a rock-solid bridge between the old surface and your new paint.
This prep work is what separates an amateur job from a professional one. It’s the foundation we build our reputation on for every professional residential interior painting contractor project we do here in the Monterey area.
Your Final Checklist Before Painting
The finish line is close, but now is not the time to get impatient. After all the hours you've poured into cleaning, patching, and sanding, this final check is what separates a good job from a flawless one.
The single most critical task right now is getting rid of every last speck of dust. Any fine dust left over from sanding will get trapped in your new paint, leaving you with a gritty finish.
Performing the Last-Look Inspection
Your MVPs for this stage are a shop vacuum with a brush attachment and a tack cloth. Start by vacuuming every inch of the surface, then gently wipe everything down with a tack cloth to grab microscopic particles.
With the dust gone, it’s time for one last, careful look. Now that your walls are primed and one uniform color, any little imperfections you might have missed will suddenly pop out.
Grab a bright flashlight and hold it close to the wall, shining the beam across the surface at a sharp angle. This "raking light" technique creates long shadows that reveal any subtle dings, ridges, or unsanded spackle patches.
If you spot anything, now is the time for a quick touch-up. Taking a few extra minutes for this final inspection guarantees that your prep work pays off. It's a vital part of any successful paint job, including a full home renovation in Pacific Grove.
This level of detailed prep is becoming more important than ever. The global interior paint market is expected to reach USD 28.34 billion by 2033, with over 55% driven by homeowners like you. With eco-friendly paints seeing a 35% rise in popularity, their formulation often demands an even cleaner surface, making meticulous prep non-negotiable. You can discover more about these market trends here.
Frequently Asked Questions (FAQs)
Here are answers to some of the most common questions we hear from homeowners across Salinas and the Monterey Peninsula about how to prepare walls for painting.
1. Do I really need primer if my paint is a "paint and primer in one"?
It depends. For a simple refresh (repainting a wall in good shape with a similar color), a 2-in-1 product can work. But for new drywall, tough stains like water spots, or drastic color changes (like dark to light), a separate, dedicated primer is essential for a professional result.
2. How long should I wait between cleaning, priming, and painting?
Patience is key. After washing, walls must be 100% dry, which can take 1-4 hours depending on airflow. For primer, always check the can for recoat times. Most latex primers are ready for a topcoat in 3-4 hours. Painting too soon traps moisture and can cause peeling.
3. What is the best way to fix fine hairline cracks?
For tiny, spiderweb-like cracks, we recommend a flexible, paintable acrylic caulk instead of spackle. Apply a very thin bead into the crack, then smooth it flush with a damp finger. Caulk's flexibility helps prevent the crack from reappearing.
4. Is sanding necessary if my wall already feels smooth?
Yes. Even on a smooth wall, a quick "scuff sand" with fine-grit sandpaper (180-220 grit) is critical, especially if the old paint has any shine. This dulls the surface and creates microscopic scratches that help the new paint adhere properly, extending the life of your paint job.
5. How can I find all the small imperfections on my wall?
Your sense of touch is more reliable than your eyes. After sanding a patch, close your eyes and run your hand over it. If you can feel a ridge, it needs more sanding. Also, use the "raking light" technique: shine a bright light across the wall's surface at a low angle to make shadows reveal any dings or bumps.
Ready to skip the prep work and guarantee a flawless, professional finish? The team at Legacy Painting & Renovating Inc. is here to help. Contact us today for a free, no-obligation estimate for your home in Salinas, Monterey, or anywhere in the surrounding communities.