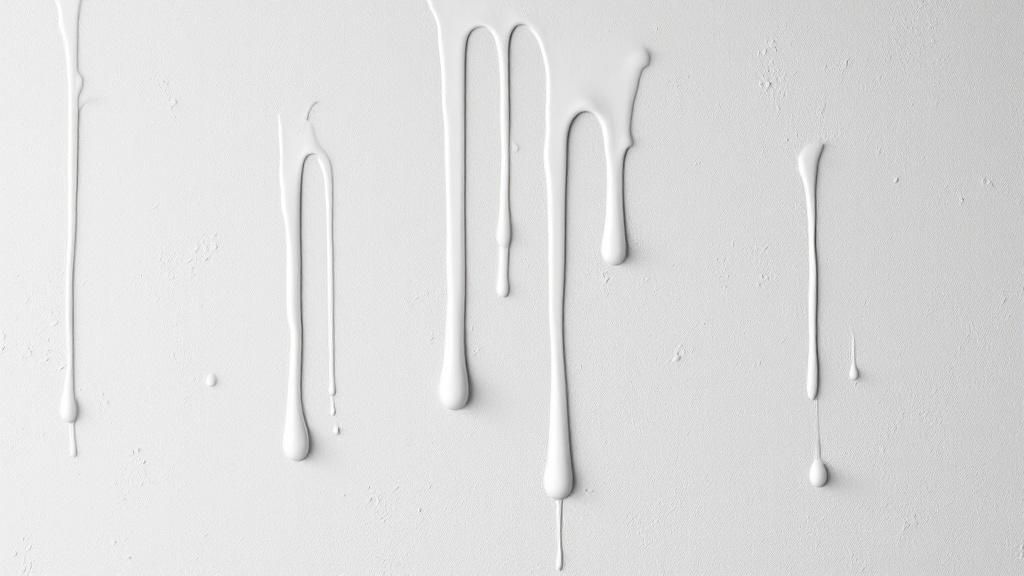
There’s nothing more frustrating than standing back to admire a fresh paint job, only to spot it: the dreaded drip. It’s a blemish that can make an otherwise perfect wall look amateur.
To fix paint drips like a pro, you first have to figure out if the paint is wet or dry. A wet drip can be smoothed out with a careful brushstroke, but a dried drip must be sanded flat before repainting. This guide will show you how to handle both for a seamless result.
Your Essential Guide to Flawless Paint Drip Repair
It happens to the best of us. Whether you're a first-time DIYer tackling a bedroom in Salinas or an experienced homeowner refreshing a living room in Carmel, that single, stubborn drip can feel like a disaster.
The good news is that it’s entirely fixable. The key is patience and knowing what you're dealing with. Jump the gun on a semi-dry drip, and you’ll turn a small bump into a gummy mess. This guide will walk you through the professional techniques to make those mistakes vanish.
Wet Drips vs. Dried Drips
Your first move is the most critical: is the paint still wet, or has it already hardened? A fresh, wet drip is the easiest to correct, but you must act fast.
Dried drips, on the other hand, are the hardened ridges that catch your eye every time you walk by. They require a more methodical repair process, starting with careful sanding to get the surface perfectly level again.
Wet vs. Dried Drip Repair At a Glance
The table below breaks down how we approach each type of drip.
| Drip Status | Best Time to Fix | Primary Tool | Key Action |
|---|---|---|---|
| Wet | Immediately | A clean, quality paintbrush | Gently smooth and feather the drip into the surrounding wet paint. |
| Dried | After the paint has fully cured (24-48 hours) | A sanding block or razor blade | Carefully sand or slice the drip off until the surface is completely flat. |
As you can see, timing is everything. Trying to sand a wet drip or brush a dry one will only make the problem worse.
The most important rule a professional painter follows is that you can never just paint over a drip. You have to restore the flat plane of the wall first. If you don't, the new coat of paint will only magnify the imperfection underneath.
The Importance of Surface Preparation
No matter if the drip was wet or dry, the final result hinges on excellent surface preparation for painting. This isn’t just about sanding away the problem; it’s about creating a flawless canvas for your touch-up.
A clean, smooth, and properly prepped area is what allows the new paint to blend invisibly with the old. By following the right steps, you can ensure your walls in Monterey or Pacific Grove look professionally finished.
Why Paint Drips Happen and How to Prevent Them
To fix paint drips, it helps to understand why they happen in the first place. Drips, runs, and sags are almost always a sign of an application problem. Mastering your technique will save you countless hours of repair work later.
The most common mistake is simply overloading the brush or roller. It’s tempting to pile on the paint to finish faster, but excess paint will run down the wall. Applying one super-thick coat is another sure-fire way to get drips, as the paint’s own weight works against it.
Understanding Paint Viscosity
Another critical factor is the paint's consistency, or viscosity. If paint is too thin for the conditions, it's going to run.
This is a huge deal for homeowners undertaking interior painting in Monterey or Carmel. The coastal humidity slows down drying times, giving the paint more time to sag and drip on vertical surfaces. Proper application technique is crucial for a flawless finish in these areas.
A true pro always checks the paint’s consistency before the first dip of the brush. If it seems too thin, a good stir or a change in room temperature might be all it needs. Never add thinning agents unless the manufacturer's directions specifically say to.
Proactive Prevention Techniques
Avoiding drips comes down to disciplined habits. If you adopt a few professional techniques, you can keep your paint job smooth from start to finish.
- Load Your Brush Correctly: Only dip your brush about one-third of the way into the paint. Tap it gently against the inside of the can to knock off the excess.
- Maintain a ‘Wet Edge’: Always work from a dry area back into the wet paint you just applied. This prevents ugly lap marks and helps everything blend seamlessly.
- Apply Thin, Even Coats: It is always better to apply two thin coats than one thick one. Allow the paint plenty of time to dry between coats.
Drips aren't the only issue that can ruin a perfect paint job. If you've ever seen blisters on your walls, learn more about what causes paint to bubble so you can avoid that headache, too.
Assembling Your Paint Drip Repair Toolkit
Before you fix paint drips, gather your gear. Having the right tools makes the job go smoothly. For homeowners tackling projects in Salinas or Monterey, having these items ready means you’re prepared for any drip.
Essential Gear for Dried Drip Repairs
Fixing a hardened drip involves more than just painting over it. The goal is to carefully remove the raised imperfection to create a perfectly flat surface.
- Sharp Utility Knife or Razor Blade: A pro’s secret for large drips. A sharp blade lets you slice off most of the raised bump, cutting down on sanding time.
- Sanding Block: This is a non-negotiable tool. A firm sanding block keeps the surface perfectly flat while you work, preventing you from sanding a divot into the wall.
- Assorted Sandpaper Grits: Start with a medium 150-grit to level the drip, then follow up with a fine 220-grit to erase sanding scratches for a seamless blend.
A classic mistake is stopping after using a coarse grit sandpaper. Sure, it removes the drip, but it leaves behind scratches that will show through the new paint. Finishing with fine-grit paper is the key to an invisible repair.
Must-Have Items for Cleanup and Safety
A great repair isn’t just about the fix—it’s about doing it cleanly and safely.
- Safety Goggles: Sanding kicks up fine dust particles. Always protect your eyes, even for a quick job.
- Tack Cloth or Microfiber Towel: After you sand, this will grab every last particle of dust, ensuring your new paint has a clean surface to adhere to.
- Primer and Matching Paint: You’ll need to prime the sanded spot to seal it and ensure a perfect color match with the original paint.
Properly preparing the area is the foundation of any good paint job. For a much deeper dive, you can learn how to clean walls before painting in our detailed guide.
The Method for Fixing Dried Paint Drips
Once a drip has cured, it requires a patient, methodical approach to fix correctly. This precise repair process, when done right, leaves an invisible mend on your walls.
For a prominent drip, take a sharp utility knife and gently slice off the bulk of the raised paint. The goal isn't to cut into the wall but to shave the drip until it’s almost flush with the surface. This significantly reduces your sanding time.
Sanding for a Flawless Surface
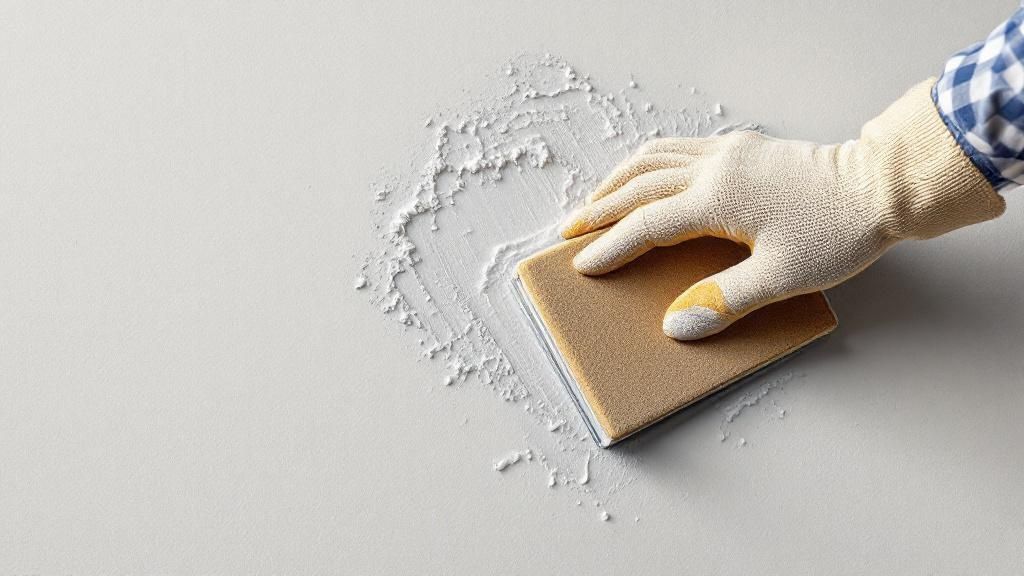
With the worst of the drip gone, it's time to sand the area until it's perfectly flat. This stage is absolutely crucial.
Wrap a piece of 150-grit sandpaper around a sanding block. Using a block distributes pressure evenly and prevents you from creating a new divot. Work in small, controlled motions until you can no longer feel a bump.
Pro Tip: As you sand, focus on "feathering" the edges. Lightly sand the area just outside the repair spot to create a gradual, smooth transition. This is the secret to making your touch-up blend seamlessly later.
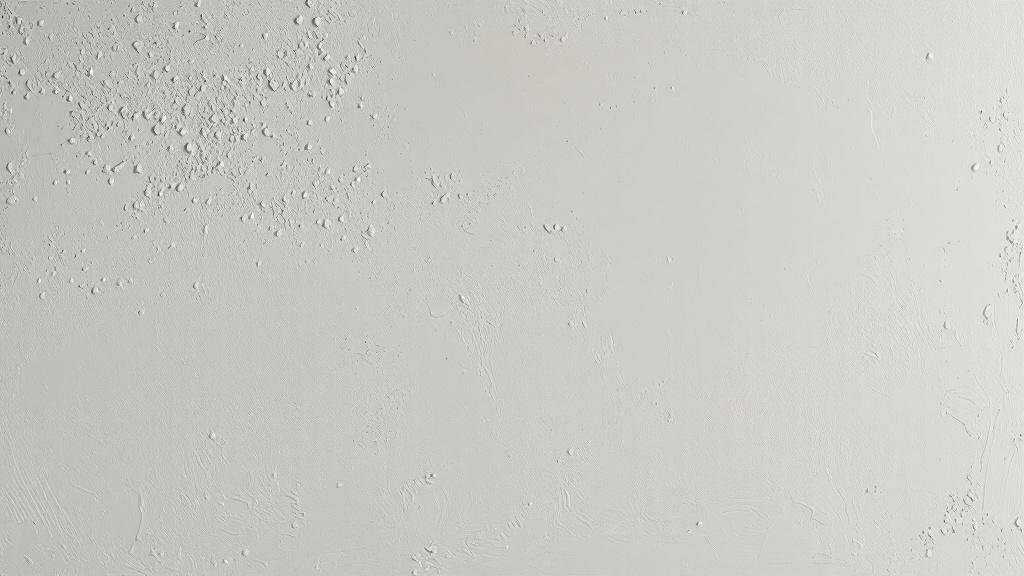
After leveling the area, switch to a fine 220-grit sandpaper. This final, lighter sanding will smooth out any minor scratches, giving you a perfect canvas.
The Critical Final Cleanup
Once you’re satisfied that the surface is perfectly smooth, the last step is a thorough cleaning. Sanding creates a fine layer of dust that will ruin your paint job.
New paint will not stick properly to a dusty surface. It will leave you with a gritty, uneven finish that looks unprofessional.
Grab a tack cloth or a slightly damp microfiber towel and meticulously wipe away every last speck of dust. Run your hand over the area one last time to ensure it’s completely clean and smooth before priming.
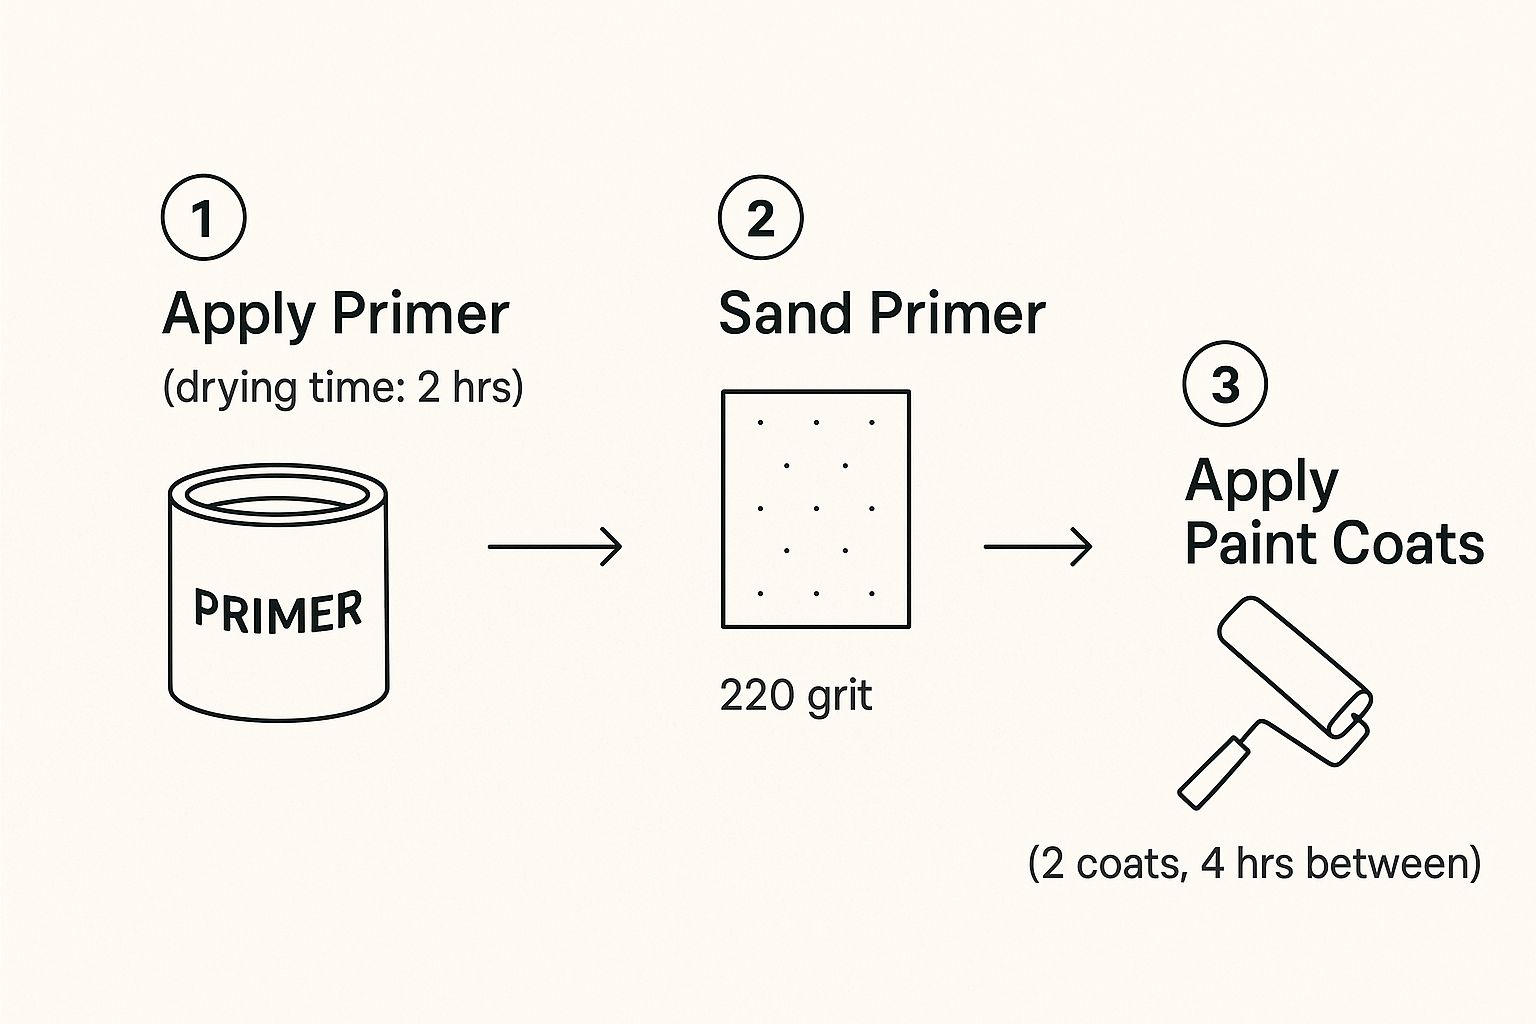
Repainting and Blending for an Invisible Repair
This is where your patient prep work pays off. The final repainting and blending stage is what separates an obvious patch from a professional, invisible repair.
Start with a thin, even coat of high-quality primer. Apply it only to the sanded area using a small artist's brush for precision. This critical step seals the repair and prevents a dull spot from appearing in your final topcoat.
Achieving a Perfect Match
Once the primer is dry, you can apply the topcoat. The most important factor for a seamless finish is using paint from the original can. Even professionally mixed paints can have tiny variations between batches.
If you don't have the original can, our team has expert advice on how to match paint color. Having the right paint is essential for a professional finish on any Salinas home renovation project.
Expert Tip: To avoid creating new brush marks, try a technique called stippling. Lightly dab the paint onto the primed area with the tip of your brush. This method helps the new paint melt into the texture of the surrounding wall.
Feathering for a Seamless Transition
As you apply the touch-up paint, the main goal is to make the edges of your repair disappear. We do this by feathering. Use a nearly dry brush to lightly sweep the fresh paint from the center of the repair outward, blending it into the existing paint.
This technique diffuses any hard line between the new and old paint, creating a soft transition. Take your time here; rushing will create a visible edge that defeats the purpose of the repair. Modern paint repair is a systematic process supported by a growing coatings market; you can explore these insights on refinishing trends.
Finally, match the texture. If the original wall was painted with a roller, it has a slight "orange peel" texture. Dabbing the spot with a small piece of a roller cover will mimic this perfectly, leaving your walls in Monterey or Salinas looking flawless.
Frequently Asked Questions
After years of handling projects all over Monterey County, from Salinas to Carmel, we’ve fixed more paint drips than we can count. Here are answers to the most common questions we hear from homeowners.
1. Can I just paint over a small paint drip?
No, even if the drip is tiny. Painting over a hardened drip only makes it stand out more, as the new paint follows the contour of the bump. The only way to get a professional finish is to sand the drip completely flush with the wall first.
2. What is the best sandpaper for removing paint drips?
A two-step approach is best. Start with 150-grit sandpaper to level the drip efficiently, then switch to 220-grit sandpaper to smooth out any scratches and feather the edges for a seamless blend. Always use a sanding block for an even, flat surface.
3. How long should I wait before fixing a paint drip?
If the paint is still wet, you can smooth it out immediately with a light brushstroke. However, if the paint has started to get tacky or gummy, stop. Trying to fix it will create a smeared mess. Let it cure completely (24-48 hours) before sanding.
4. Do I need to prime after sanding down a drip?
Yes, you almost always need to prime. If you've sanded down to the bare drywall, plaster, or a previous paint layer, priming is essential. It seals the porous spot and ensures the final sheen will match the rest of the wall, preventing a dull or "flashing" spot.
5. What if the drip is on a textured wall?
Fixing a drip on a textured surface is trickier but doable. Carefully sand only the drip itself until it's flat. Then, re-apply the texture using an aerosol spray texture can, practicing on cardboard first to match the pattern before spraying the wall. Once dry, prime and paint to match.
Don't let a simple paint drip undermine all your hard work. If you’re dealing with a paint problem that feels too much for a DIY fix, or you just want a perfect finish from our Carmel commercial painters, give Legacy Painting and Renovating Inc. a call. We offer a free, no-obligation estimate for homeowners throughout Monterey County.