Giving your metalwork a fresh coat of paint might feel like a big project. But it all comes down to a simple process: clean the surface, get rid of all rust, apply a good primer, and finish with a strong topcoat.
When you follow these steps, that rusted railing or faded patio furniture gets a complete makeover. It will look like new and be protected from the weather. We’re here to walk you through how to get a professional-quality finish, every time.
Your Guide to a Perfect Metal Paint Job
Painting metal is about more than just looks; it’s a key defense against rust and daily use. A wrought iron fence in Carmel or an aluminum patio set in Salinas is always fighting moisture and changing temperatures. A good paint job acts as a shield, stopping rust and preventing decay.
This guide gives you practical, clear advice from our team’s years of experience on painting projects across Monterey County. We’ll break down the steps that ensure your paint looks great and lasts for years. The secret isn’t a magic trick—it’s all about good preparation.
Laying the Foundation for a Lasting Finish
Before you open a can of paint, you need to know what you’re working with. The type of metal—steel, aluminum, or iron—will decide the prep work and products you’ll need. Each one acts differently and affects how well paint will stick.
Key Takeaway: We always say that 90% of a successful metal painting project is preparation. Rushing this stage is the top reason we see paint jobs fail, leading to peeling, chipping, and rust coming back.
Taking the time to clean, sand, and prime the surface creates the perfect canvas for your topcoat. It’s like building a house: you wouldn’t skip the foundation and expect it to hold up. The same logic applies here.
Metal Painting At a Glance
Here’s a quick summary of the key stages for painting any metal surface.
| Stage | Key Objective | Essential Tools |
|---|---|---|
| Surface Assessment | Identify metal type and check for damage or rust. | Magnet, visual inspection |
| Cleaning & Degreasing | Remove all dirt, grease, and grime. | Degreaser, scrub brushes, pressure washer |
| Rust & Paint Removal | Strip away old paint and all signs of rust. | Wire brush, sander, chemical stripper |
| Priming | Apply a special metal primer to seal the surface. | High-quality brush, roller, or sprayer |
| Topcoat Application | Apply durable paint for color and protection. | Brush, roller, or sprayer |
This table shows the journey, but success is in the details of each step.
Why Quality Metal Coatings Matter
There’s a reason the demand for good metal protection is so high. The global market for metal coatings was valued at around USD 18.9 billion in 2024 and is expected to grow. This shows how important coatings are for making things like buildings, cars, and your backyard furniture last longer.
If you’re curious, you can explore the full research about the metal coatings market to see just how big this industry is.
For homeowners in places like Monterey and Pacific Grove, investing in the right materials pays off. By following these steps, you can get a tough, beautiful finish that adds to your property’s value and protects it from the coastal air.
Choosing Your Tools and Materials
Walking into a hardware store for a metal painting project can be overwhelming. You’ll see aisles of brushes, rollers, and paints. It’s tempting to just grab what looks right, but choosing the right supplies is key to a job that lasts.
Think of it like cooking. You wouldn’t use a wok to bake a cake. You can’t just use any old primer on any type of metal. Your project’s success depends on matching the product to the surface, especially with the different climates from Salinas to the coast.
Picking the Perfect Primer
If there’s one thing you don’t cut corners on, it’s primer. It is the most important product you’ll buy. Primer acts as the “glue” that helps your topcoat stick and the “shield” that fights rust.
You’ll mainly see two types:
- Rust-Inhibiting Primer: This is for ferrous metals like iron and steel. If you’re fixing a rusty wrought iron fence in Carmel, a quality oil-based, rust-inhibiting primer is a must. It bonds with the surface to stop rust.
- Self-Etching Primer: This is essential for non-ferrous metals like aluminum, brass, or galvanized steel. These metals are too smooth for regular primer. A self-etching primer has a mild acid that lightly “etches” the surface, creating a texture for the paint to grab onto.
Expert Insight: Applying the wrong primer is a costly mistake. We’ve seen paint peel off aluminum railings because a standard primer was used. Always check the can to make sure it’s right for your metal.
Selecting the Right Paint
Once the surface is primed, it’s time for color. The choice between oil-based and water-based paints depends on where the project is and how much wear it will get.
Oil-Based Enamel Paints
These are the classic choice for high-traffic, outdoor metal. They dry to a hard, durable shell that resists chipping and bad weather. For a front gate or handrail, oil-based enamel is a great option.
Water-Based (Acrylic) Paints
Modern acrylics have improved a lot. Direct-to-Metal (DTM) acrylic paints are a fantastic choice, offering great durability and rust protection. They can expand and contract with the metal, which helps prevent cracking. Plus, they have low odor and easy soap-and-water cleanup.
Learning about paint types is a useful skill for other jobs, too. You can see this in our helpful exterior house painting tips.
Choosing Your Application Tools
The tool you use makes a big difference in the final look. Investing in good quality tools will save you frustration and give you a smoother finish.
- Brushes: For small, detailed work like railings, a high-quality natural bristle brush (for oil-based paints) or a synthetic brush (for water-based paints) gives you the best control.
- Rollers: A small, 4-inch roller with a foam cover is great for flat surfaces like metal doors. It helps you cover the area quickly and avoid brush strokes.
- Paint Sprayers: If you’re painting something with lots of nooks and crannies, a sprayer is your best friend. It delivers a flawless, factory-like finish.
By carefully selecting your primer, paint, and tools, you’re setting yourself up for a project that looks great and lasts for years.
Mastering Surface Preparation
Ask any painter from Salinas to Carmel, and they’ll say a great paint job is 90% preparation. The real work happens before you even open the paint can. This is the stage that separates a finish that lasts a decade from one that peels in a single season.
Good prep is a must because it creates the perfect foundation for the primer and paint to stick. Think of it as making a clean, slightly rough canvas. Without it, even the best paint will fail. This is especially true for metal, which is smooth and non-porous.
The First Step Always Starts With Cleaning
Before you deal with rust or old paint, you have to get the surface completely clean. Metal objects, especially those outdoors, collect dirt, grease, and grime. Paint will not stick to a dirty surface.
Start by scrubbing the piece with a strong degreasing cleaner and water. For big jobs like a metal fence, a power washer can save a lot of time. If you have tough grime, a guide to diesel pressure cleaners can offer tips on heavy-duty cleaning.
Tackling Rust and Old Paint
Once the metal is clean and dry, it’s time to deal with rust or failing paint. This part takes work, but it’s very important. You have to remove anything that is loose, flaking, or rusted.
Here are a few ways to do this:
- Manual Removal: For light rust, a stiff wire brush and some effort work well. Then, use sandpaper to smooth the edges where old paint meets bare metal.
- Power Tools: For more serious rust, a power sander or a drill with a wire wheel attachment will make the job faster. Always wear safety glasses and a dust mask.
- Chemical Strippers: If you have thick layers of old paint, a chemical paint stripper might be best. Follow the directions and scrape the soft paint away.
The goal is to remove everything that is loose. Your new paint is only as strong as the surface it’s sticking to.
A Quick Tip from the Field: For light surface rust, a simple mix of vinegar and water can work. The mild acid helps dissolve the rust. Be sure to rinse the surface with clean water afterward.
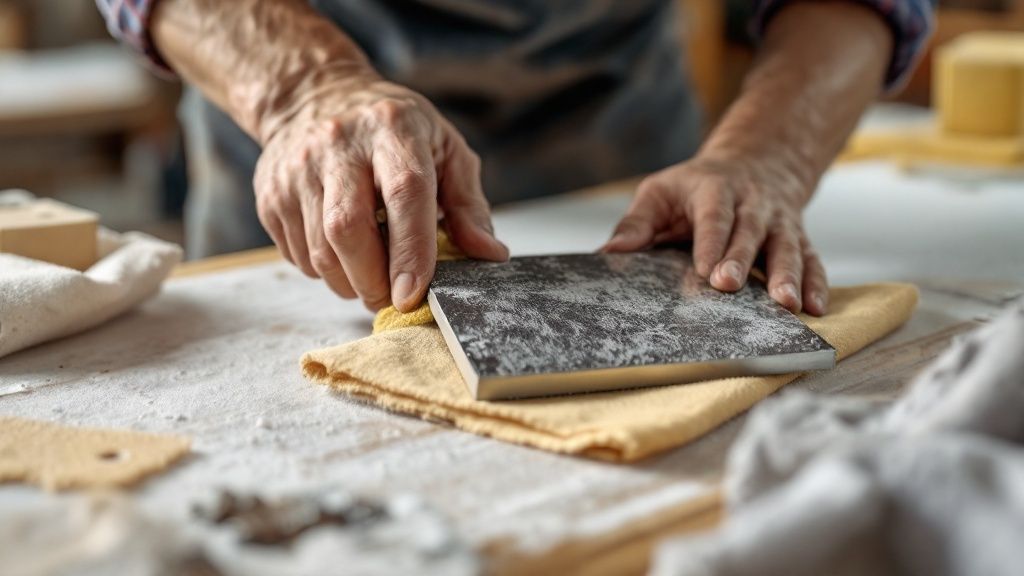
Preparing Previously Painted Surfaces
What if the old paint is still in good shape? You don’t always have to strip it all off. If the old paint is sticking well, you just need to prep it for a new coat.
After cleaning, the key is to de-gloss the surface. Use medium-grit sandpaper (around 120-180 grit) to lightly scuff the surface. This dulls the old finish and gives the new primer something to grip. We use a similar method when we prepare walls for painting; creating the right surface is key for any material.
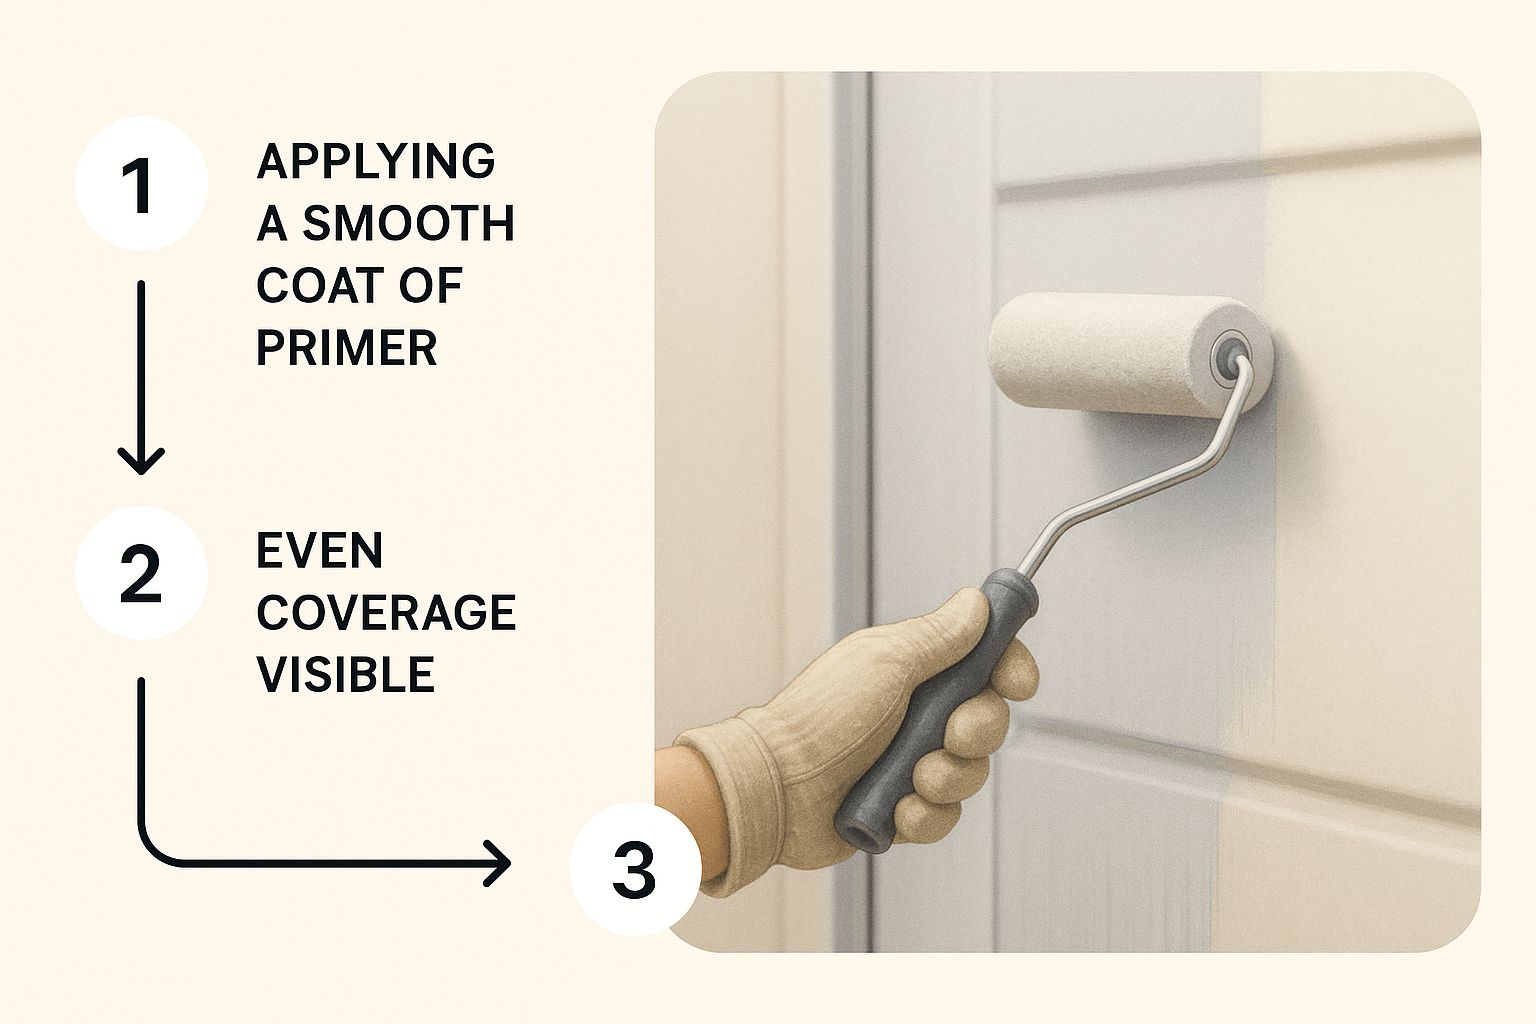
As you can see, the primer flows evenly over the prepared metal. This creates the uniform base needed for a flawless topcoat.
The Final Wipe-Down
You’ve cleaned and sanded, and now there is dust all over your project. This final step before priming is key: you have to remove every last bit of dust.
Use a vacuum with a brush attachment to get most of the dust. Then, follow up with a tack cloth. This is a sticky cloth designed to pick up fine dust. Wipe down the entire surface, and you’ll have a perfectly clean surface ready for primer.
Applying Primer and Paint Like a Pro
You’ve done the hard work of prepping the surface. Now comes the fun part, where the real change happens. Getting the primer and paint on correctly is what makes a professional, durable finish.
This is not a race. The secret is building thin, even layers that create a tough, protective shield. A little patience now goes a long way.
The Critical First Layer: Applying Primer
Think of primer as the bridge between bare metal and your final paint color. Its job is to create a uniform surface that the topcoat can grip. A good primer coat is your best defense against chipping, peeling, and rust.
For more details, check out our guide on what paint primer is used for and why you should never skip it.
When applying primer, remember the rule “thin to win.” One thick coat will lead to drips and uneven drying. Your goal should be one or two light, even coats.
Here are a few tips for a perfect primer application:
- Maintain a Wet Edge: As you brush or roll, always overlap your last stroke slightly while it’s still wet. This helps prevent lines and gives you a smooth finish.
- Respect Drying Times: Check the can for the recommended recoat time and stick to it. Painting before the primer is cured can cause problems later.
- Feel for Imperfections: Once the primer is dry, run your hand over it. If you feel any rough spots, gently sand them with fine-grit sandpaper (220-grit) and wipe the dust away before painting.
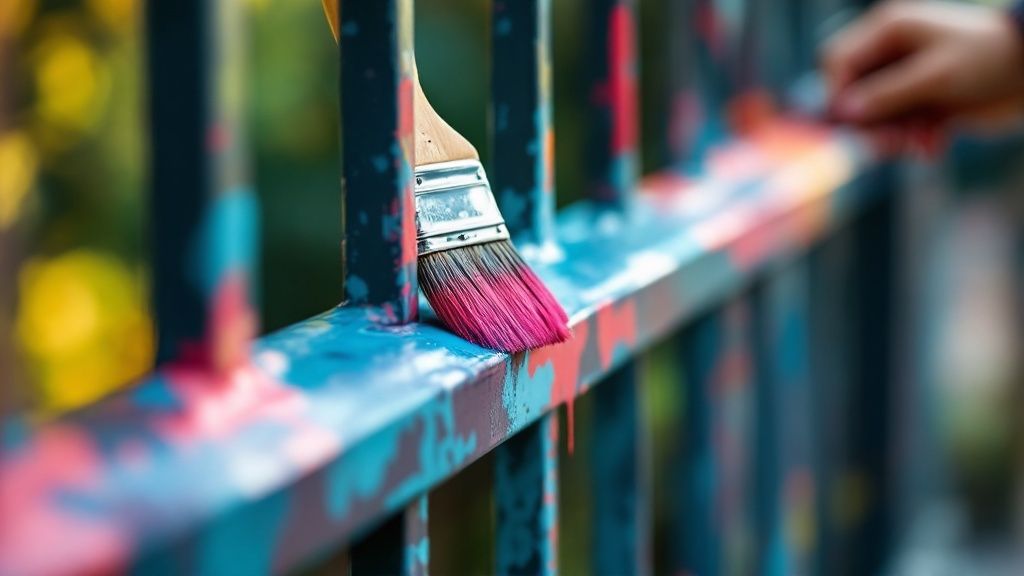
Techniques for a Professional Paint Application
Once your primer has cured, it’s time for the color. The same rule applies here: multiple thin coats are better than one thick one. This is how you avoid drips and brush marks.
You’re slowly building up the color and protective finish. Most projects will need at least two thin coats of paint for full coverage and durability. Let the first coat dry completely before starting the second.
A Pro Painter’s Secret: When using a brush, always finish your strokes in the same direction. This simple trick helps hide brush marks and gives you a more uniform look.
Choosing the Right Day to Paint
Weather has a big impact on your paint job, especially in coastal towns like Monterey and Pacific Grove. Humidity, temperature, and sun can affect how your paint dries.
For painting metal outdoors, these are the ideal conditions:
- Temperature: Stick to a range between 50°F and 90°F. Paint struggles to cure in the cold and can dry too fast in the heat.
- Humidity: Try to paint when humidity is below 60%. High humidity slows drying and can trap moisture under the paint.
- Sunlight: Avoid painting in direct sunlight. The heat can cause the paint to “skin over” too quickly, ruining the finish.
A calm, overcast, and dry day is the perfect time for painting metal outside. Checking the local Salinas forecast can make a big difference.
Curing and Maintaining Your New Finish
Just because the paint feels dry doesn’t mean the job is done. The curing process has just begun. This is where the paint turns into a tough, protective shell.
There’s a big difference between paint being dry to the touch and being fully cured. “Dry” means the surface isn’t tacky. “Cured” means the paint has fully hardened and is ready to stand up to scratches, chemicals, and the salty air in Pacific Grove.
Understanding Paint Curing Times
So, how long does this take? It can be anywhere from a few days to a full month. The time depends on the paint type, temperature, and humidity. An oil-based enamel in a cool, damp Carmel winter will take longer to cure than an acrylic paint on a hot Salinas day.
While the paint is curing, you need to be careful with the surface.
- Avoid Heavy Use: Don’t stack things on that freshly painted metal table.
- Protect from Moisture: Keep the item out of the rain or heavy dew if you can.
- Hold Off on Cleaning: Wait at least a few weeks before scrubbing it down.
The biggest mistake people make is rushing to use a newly painted item. Patience is key here. Giving the paint time to cure is like an insurance policy for a durable finish.
Simple Maintenance for Lasting Results
Once the paint is cured, keeping it looking great is simple. You don’t need to spend hours on it. For most painted metal, a simple wash is all it takes.
Just mix a mild soap with warm water and use a soft cloth to gently wipe the surface. Avoid harsh pads, chemical cleaners, or pressure washers. These can strip the protective layer off your paint.
This kind of care is more important than ever. The coatings industry is always changing. Fact.MR projects the global metal coatings market will hit USD 18.7 billion in 2025. This boom is all about the demand for tougher, eco-friendly coatings. You can discover more about the growing metal coatings market to see where the industry is going.
Spotting and Touching Up Early Wear
No paint job lasts forever, but you can extend its life by catching small problems early. Inspect your painted metal surfaces once or twice a year.
Keep an eye on these trouble spots:
- Edges and Corners: These areas get the most wear.
- Fasteners: Check for rust around screws or bolts.
- Horizontal Surfaces: Any flat surface where water can sit is more likely to get damaged.
If you spot a small chip, the fix is easy. Lightly sand the area, wipe away the dust, then apply a small amount of the same primer and paint. Taking care of these little flaws right away stops moisture from getting under the paint and prevents rust. It’s also important to catch any drips while the paint is fresh; you can learn more about how to fix paint drips to get a smooth finish.
Your Top Questions About Painting Metal Answered
Even with a good guide, questions can come up. In the Monterey Bay area, we hear many of the same concerns from homeowners. Here are answers to the five most common questions we get.
1. Can I Just Paint Directly Over a Rusty Metal Surface?
This is the top question, and the answer is no—not if you want the job to last. Painting over loose rust is like building on sand. Your new paint will start to bubble and peel off.
You must remove all loose rust first. A wire brush and sandpaper are your best tools here. For any leftover surface rust, a rust-reforming primer is a great product. It converts the rust into a stable surface that’s ready for paint.
2. What’s the Best Paint for My Outdoor Metal Furniture?
When painting anything for the outdoors, especially in coastal areas like Carmel, durability is everything. You have two excellent choices:
- Oil-Based Enamel: This is the classic choice for outdoor metal. It dries to a very hard finish that resists chips and bad weather.
- Direct-to-Metal (DTM) Acrylic Paint: Modern DTM acrylics are fantastic. They offer great rust protection and are more flexible than enamels. Plus, they have low odor and easy cleanup.
No matter which you choose, make sure the label says it’s for exterior use.
3. Do I Really Need to Use a Primer on Metal?
Yes. We can’t say it enough. You almost always need to use a primer. Metal is smooth, so paint has nothing to grab onto. Primer creates a strong bond between the metal and your topcoat.
It also provides a barrier against rust and creates a uniform base, so your final color looks richer. Do not skip this step.
4. How Do I Keep Paint from Peeling off Galvanized Metal?
Galvanized metal is known for shedding paint. That’s because it has a slick zinc coating. Success with galvanized steel comes down to a specific prep process:
- Clean It Well: You have to get rid of the factory oil. Scrub the surface with a degreaser and rinse it completely.
- Use the Right Primer: You need a primer made for galvanized surfaces. Look for a water-based acrylic primer that says so on the can.
- Finish with a Quality Topcoat: Once the primer has cured, you can paint it with any quality exterior acrylic paint.
5. What Is the Perfect Weather for Painting Metal Outdoors?
Weather is a huge factor. You’re looking for a day that’s not too hot, not too cold, and not too humid. Aim for these conditions:
- Temperature: Between 50°F and 90°F.
- Humidity: Below 60%.
- Sunlight: Try to avoid painting in direct, hot sun.
A calm, dry, overcast day is your best bet for a smooth finish and a durable cure.
Hopefully, these answers clear things up. If you’re in the Salinas or Monterey area and decide you’d rather have a professional handle the job, Legacy Painting and Renovating Inc. is here to help.
Contact Legacy Painting & Renovating Inc. for a Free Estimate and let our team give you a flawless finish that’s built to last.