Drywall damage is a common problem in many homes. A small nail hole or a bigger dent from a doorknob might seem easy to fix yourself. Many homeowners in Salinas and Monterey think a little spackle will solve the problem.
But at Legacy Painting & Renovating Inc., we've seen many DIY repairs go wrong. A bad patch job can look worse than the original damage and cost more to fix later. Learning how to avoid common errors is key to getting a great result.
The difference between a perfect repair and a lumpy patch comes down to avoiding a few mistakes. These are the steps professionals use to get smooth, flawless walls. Before you start your next drywall project, let's look at the common mistakes we fix in homes across Carmel and Pacific Grove. This guide shares our experience to help you avoid repeat repairs.
We'll cover the top 5 mistakes to avoid when fixing drywall damage so your walls look perfect and ready for paint.
1. Not Properly Preparing the Surface
One of the biggest mistakes we see is starting a repair without preparing the wall first. Rushing this step is like building a house on a weak foundation. It leads to a patch that will crack or peel, meaning you'll have to do the work all over again.
Think of drywall mud (joint compound) like glue. It needs a clean and stable surface to stick to. If you leave dust, loose paper, or debris behind, the compound can't bond to the wall. This is a main reason why patches fail and why it's a top mistake to avoid.
Why Surface Prep is So Important
In our experience renovating homes from Salinas to Carmel, we've fixed many failed patches caused by poor prep. The result is often a bubble under the tape or a crack that shows up weeks after painting. Good prep makes the patch part of the wall, not just a cover-up.
Taking a few extra minutes to prepare the surface saves hours of rework later.
Steps for Perfect Preparation
Before you open your joint compound, follow these steps:
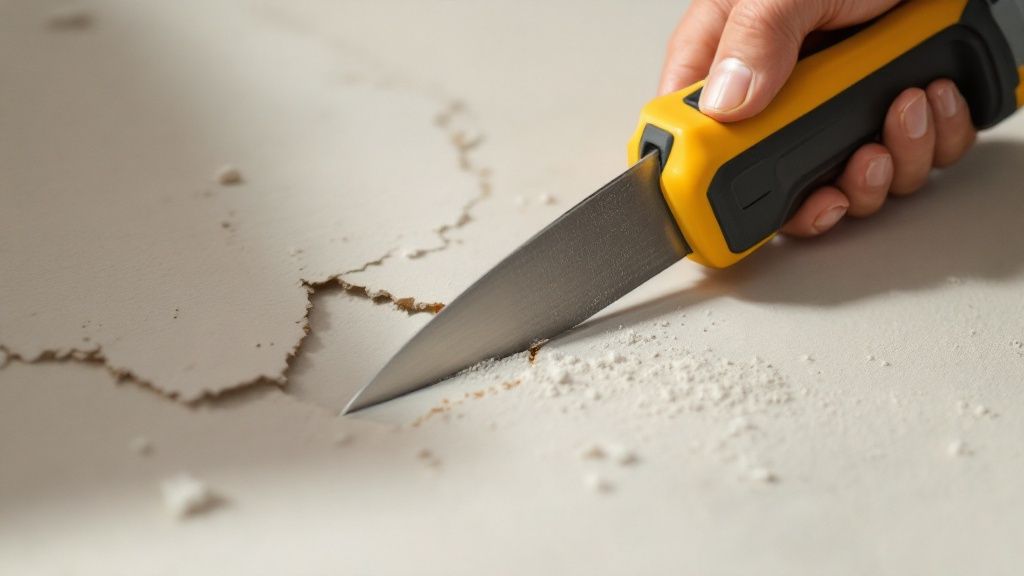
- Clean the Area: Remove any loose drywall and frayed paper around the hole. A utility knife can help create a clean, angled edge, which helps the compound stick better.
- Sand the Edges: Lightly sand the painted area around the damage with 120-grit sandpaper. This roughs up the surface so the new mud can grip it.
- Remove All Dust: This is a very important step. Use a shop vacuum to suck up all the dust. Then, wipe the area with a damp cloth to make sure it's completely clean. You can learn more about the best ways to clean walls before painting or repairs.
- Prime Exposed Paper: If the brown paper of the drywall is showing, you must seal it. Use a quick-drying drywall primer to stop moisture from the compound from creating bubbles.
Expert Insight: "We tell our clients in Pacific Grove and Monterey that 90% of a flawless drywall repair happens before the patching compound is even applied. A clean, primed, and stable surface is the only way to guarantee the patch will blend invisibly and last for years."
2. Using the Wrong Type of Patching Material
Hardware stores have many different drywall repair products. Choosing the wrong one is a common mistake we fix in homes from Salinas to Pebble Beach. Using the wrong patch material is like trying to fix a deep pothole with sand instead of asphalt. The repair won't last.
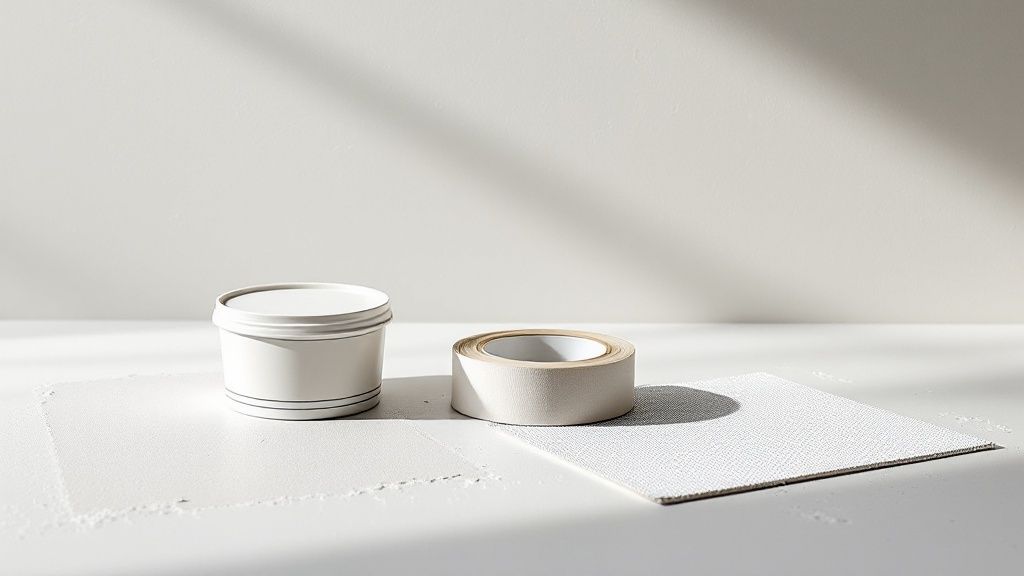
Not all patching materials are the same. Lightweight spackle, setting-type compounds (hot mud), and all-purpose joint compound are each for different jobs. Picking the right one is key for a strong repair, which is why this makes our list of the top 5 mistakes to avoid when fixing drywall damage.
Why Material Choice Matters
In our renovation projects, we’ve seen people use lightweight spackle to fill large holes. This never works. These products shrink too much and aren't strong enough for big repairs. It's like avoiding unsuitable materials when cleaning—using the right product prevents bigger problems.
A good repair needs a material that matches the size of the damage. Getting this right ensures your patch won't crack or fail later on.
Steps for Choosing the Right Material
Match your material to the damage you're fixing.
- For Small Nicks and Nail Holes: Use lightweight spackling compound. It dries fast, sands easily, and doesn't shrink much.
- For Cracks and Seams: Use all-purpose joint compound with paper tape. Paper tape is stronger than mesh for flat seams and corners.
- For Holes 1 to 6 Inches: A self-sticking mesh patch with an all-purpose compound works well. The mesh adds strength.
- For Large Holes (Over 6 inches): Use a setting-type compound, or "hot mud." It comes as a powder you mix with water and hardens chemically, making it very strong. It's perfect for deep fills.
Expert Insight: "In Carmel, where homes need a perfect finish, we always use setting-type compounds for big repairs. It dries harder than pre-mixed mud and creates a patch as strong as the original drywall."
3. Applying Compound Too Thickly
A common shortcut people take is trying to fill a hole in one go. Putting on a thick layer of joint compound seems faster, but it almost always leads to a weak, cracked repair. Thick layers of mud shrink a lot as they dry, causing cracks and making it hard to sand smooth. This mistake guarantees you'll be doing the work again.
Think of drywall repair as a process of adding thin layers. Each coat builds on the last, creating a strong patch that blends with the wall. Professional drywall finishers in Monterey know that patience and multiple thin coats are the secret to an invisible repair.
Why Thin Layers Are a Must
In our work, we often fix patches that failed because the compound was too thick. These patches can crack easily or even fall out. Building up the repair with thin layers makes sure each coat dries fully, creating a strong finish.
This method also lets you "feather" the edges of the patch into the wall, making it invisible after painting. Skipping this process creates a lumpy, obvious patch.
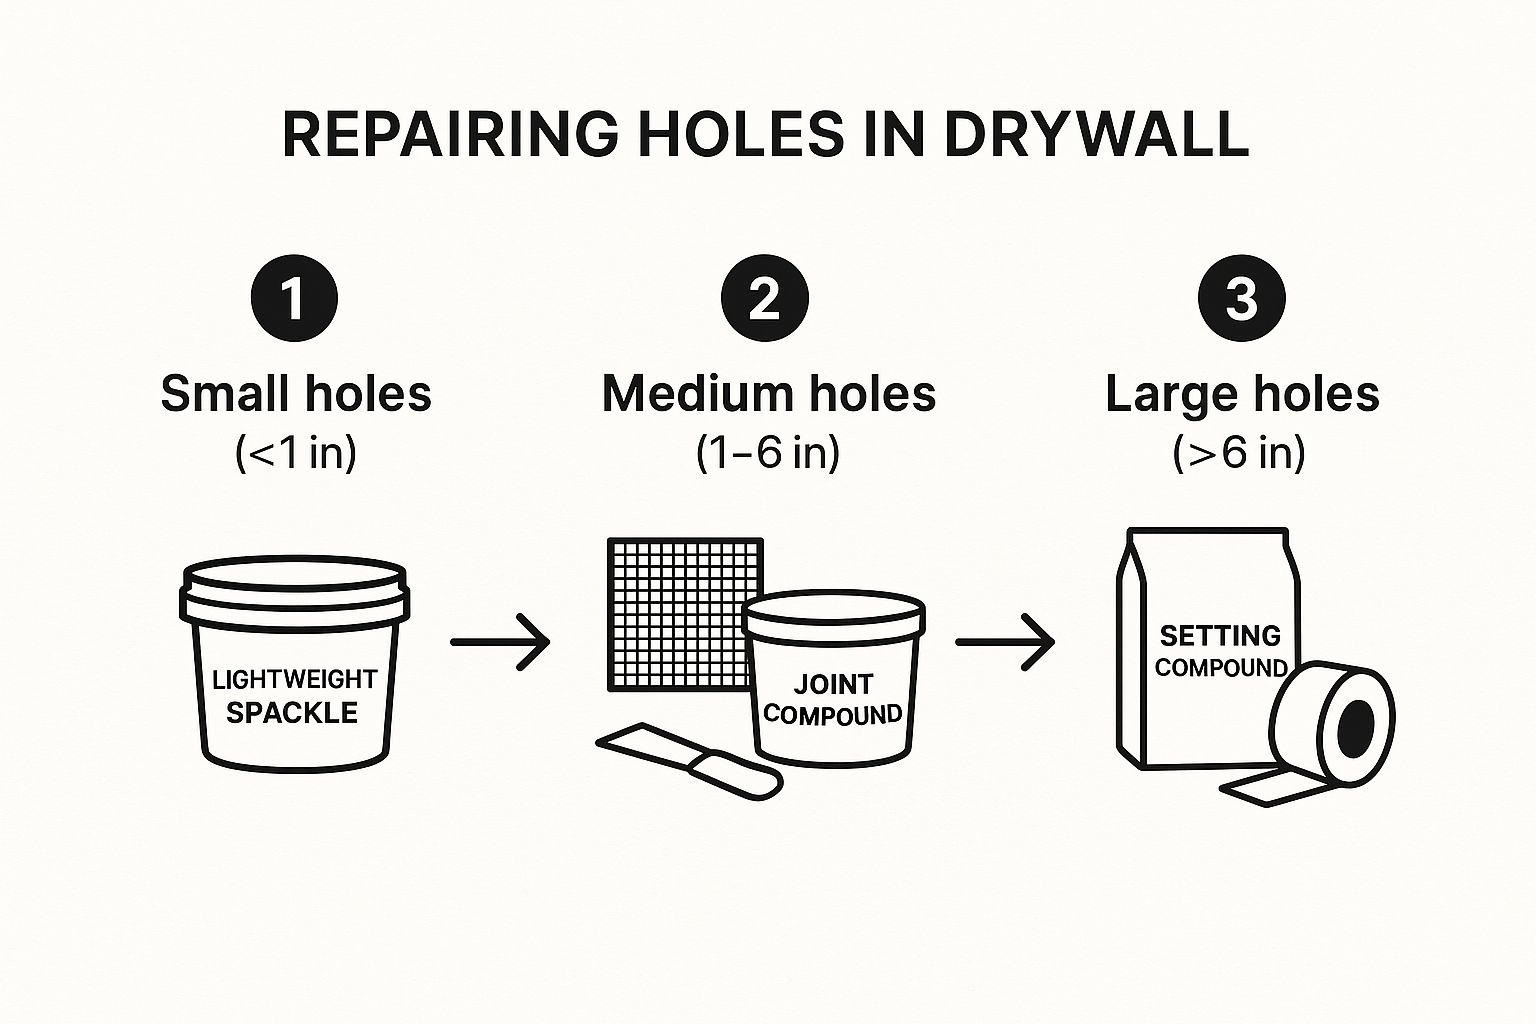
This chart shows that as damage gets bigger, the repair method must be stronger. This supports the need for a layered approach instead of one thick fill.
Steps for Perfect Layering
For a professional finish, follow this layering method.
- Apply the First Coat: Your first layer should fill most of the hole. Don't worry about it being perfectly smooth.
- Let It Dry Completely: Wait at least 24 hours for the compound to fully dry. Rushing this will ruin the patch.
- Apply a Second, Wider Coat: Use a wider drywall knife for the second coat. This layer should be thinner and extend past the edges of the first coat.
- Sand and Apply a Final Coat: Once the second coat is dry, sand it lightly. The final coat should be very thin and extend even further, creating a smooth blend. Find more tips in our guide to drywall preparation for painting.
Expert Insight: "In Carmel and Pebble Beach, a flawless finish is everything. We never apply fewer than three coats of compound. Each layer serves a purpose, from building strength to creating a perfect blend. Patience is the key."
4. Inadequate Sanding and Blending
You've applied the joint compound and it's dry. The hard part is over, right? Not quite. A huge mistake in DIY drywall repair is poor sanding. This final step is what makes a repair truly invisible. Rushing it will make the patch obvious.
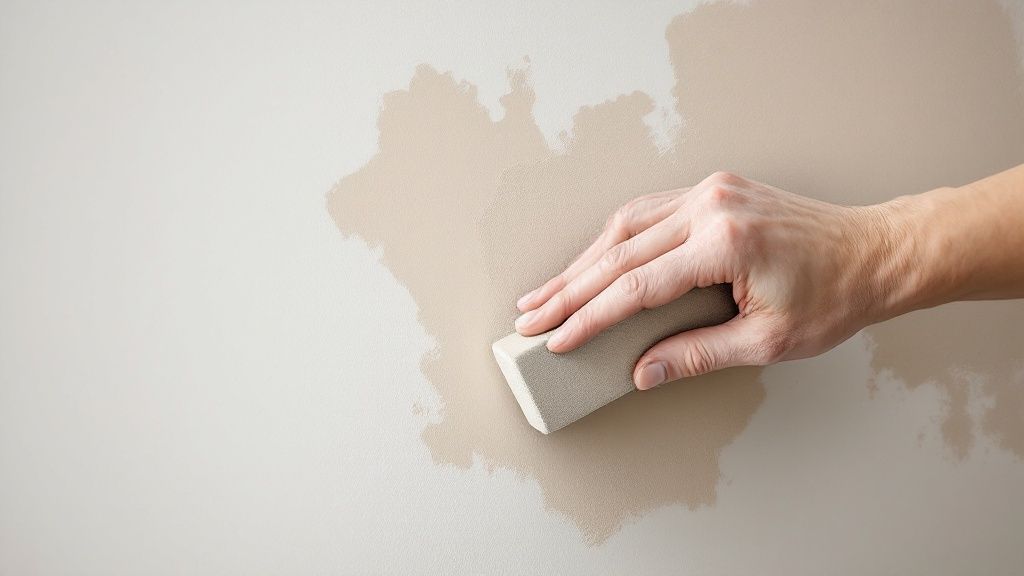
Think of sanding as sculpting a smooth transition. The goal is to feather the edges until you can't feel or see where the patch ends and the wall begins. If this step is done poorly, the texture difference will be obvious after painting, especially in bright light. This is why poor sanding is on our list of top 5 mistakes to avoid when fixing drywall damage.
Why Sanding is the Secret to a Flawless Finish
In our projects across Monterey County, the final sanding is what creates a professional look. A badly sanded patch creates a "halo" effect around the repair that you can see through the paint. Proper sanding ensures the repaired area is just as smooth as the rest of the wall, so paint looks even.
This step takes patience. Spending an extra 15 minutes to sand correctly can save you from having to do it all over again.
Steps for Perfect Blending
To make your patch disappear, follow these professional sanding tips.
- Use the Right Sandpaper: Start with medium-grit sandpaper (around 120-grit) to smooth any high spots. For the final sanding, switch to a fine-grit (220-grit) sandpaper. A sanding block helps apply even pressure.
- Feather the Edges: Focus on sanding the outer edges of the patch. Use light, circular motions and sand slightly beyond the repaired area.
- Use a Bright Light: This is a pro tip. Hold a work light at an angle to the wall. This will show any small bumps or ridges you might have missed.
- Wipe and Check by Touch: After sanding, wipe away all dust. Then, run your hand over the repair with your eyes closed. If you can feel a bump, you will see it after painting. You can learn more about surface preparation techniques on our blog.
Expert Insight: "In high-end homes in Carmel, the standard is perfection. We use dust-controlled sanding systems and angled lighting on every patch. A repair isn't finished until it's impossible to tell where it was."
5. Skipping Primer Before Painting
After all the hard work of patching and sanding, it's tempting to start painting right away. But painting directly over fresh drywall mud is a big mistake. It leads to a splotchy, uneven finish where the patch stands out. This makes it a critical error on our list of the top 5 mistakes to avoid when fixing drywall damage.
Think of drywall mud like a sponge. It absorbs more paint than the wall around it. If you paint directly on it, the mud will soak up the paint, making the spot look dull and flat. This is called "flashing," and it makes the repair very noticeable.
Why Primer is a Must
In our work on homes from Salinas to Pacific Grove, we’ve seen how skipping primer ruins a good paint job. The patched spot will look flat against the rest of the wall. Professional painters always use primer over new drywall mud for a uniform, professional finish.
Primer seals the patch and creates a consistent base. This ensures the topcoat of paint looks the same everywhere. It's the key to making your repair truly disappear.
Steps for Perfect Priming
To make sure your patch blends in, follow these steps before painting.
- Choose the Right Primer: For most drywall repairs, a water-based PVA primer is the best choice. It is made to seal porous surfaces like joint compound.
- Apply Primer to the Patch: You only need to prime the repaired area. Use a small roller or brush to apply a thin coat over the entire patch and slightly onto the surrounding wall.
- Let it Dry Completely: Follow the directions on the can for drying time. Let the primer cure fully before you start painting.
- Consider Tinting the Primer: For dark paint colors, you can have your primer tinted. This can help the paint cover better. To learn more, check out our article on what paint primer is used for on legacypaintingrenovating.com.
Expert Insight: "A client in Carmel called us to fix a 'botched' paint job, but the real issue was that no primer was used over their drywall repairs. A single coat of primer is the simple, non-negotiable step that separates a DIY-looking fix from a professional, invisible repair."
FAQs About Drywall Repair
1. What is the easiest way to fix a small nail hole in drywall?
For nail holes, the easiest method is to use a small amount of lightweight spackling compound. Apply it with a putty knife, let it dry, sand it lightly, and then prime and paint.
2. Can I use caulk to fill a hole in drywall?
No, caulk is not the right material for filling holes. Caulk is flexible and can't be sanded smooth, so the repair will always be visible. Stick to spackle or joint compound.
3. How long should I wait for drywall mud to dry between coats?
You should wait at least 24 hours for all-purpose joint compound to dry completely. If you apply another coat too soon, it will trap moisture and the patch will fail.
4. Why did my drywall patch crack after it dried?
Cracking usually happens when the joint compound is applied too thickly in one coat. It shrinks as it dries, causing cracks. Always apply thin layers to prevent this.
5. Do I need to prime the entire wall after a small repair?
No, you don't need to prime the whole wall. Just prime the patched area, making sure to extend the primer slightly onto the surrounding painted surface to ensure a good blend.
When to Call the Pros for a Flawless Finish
Learning to fix drywall is a great skill. By knowing the top 5 mistakes to avoid when fixing drywall damage, you can handle small repairs with confidence. You know to prepare the surface, choose the right material, and apply thin layers.
Remember these key takeaways:
- Prep is Everything: Always start with a clean, stable surface.
- Choose the Right Material: Match the compound to the size of the damage.
- Be Patient with Layers: Multiple thin coats are better than one thick one.
- Sand for a Smooth Blend: Proper sanding makes the repair invisible.
- Never Skip Primer: Primer ensures an even paint finish.
Avoiding these mistakes is the difference between a frustrating mess and a smooth, perfect wall. We see it all the time in homes from Salinas to Carmel—a simple DIY repair gone wrong because of an avoidable error.
However, some jobs need an expert. Large holes, water damage, or complex ceiling repairs often require a professional. For these bigger jobs, consider calling for professional drywall repair and painting services. A pro has the tools and experience to make even major damage disappear.
Ready to skip the DIY headache and get a perfect finish? The team at Legacy Painting & Renovating Inc. has fixed countless drywall issues across Monterey County, delivering seamless results that last. Contact us today for a free estimate and let our experts make your walls look new again.