Tired of staring at that outdated wallpaper? Knowing how to remove wallpaper easily comes down to one thing: understanding what you're up against before you start. Some modern strippable wallpaper is a dream to remove, often peeling off in large, satisfying sheets.
However, most wallpaper, especially in older homes around Monterey or Carmel, puts up a fight. For these stubborn jobs, you'll need to score the surface and use a liquid remover or a steamer to break down the old adhesive.
This guide provides step-by-step instructions for removing old wallpaper without damaging your walls, ensuring a perfect surface for a fresh coat of paint. Whether you're a DIY enthusiast or deciding when to call a professional, we have the expert tips you need.
Your First Steps to Effortless Wallpaper Removal
Before you grab a scraper, a bit of prep will save you from frustration and protect your home. This is the game plan for a clean, efficient job, whether you're updating a modern home in Salinas or restoring a historic property in Pacific Grove.
First, protect your room. Lay down drop cloths to cover the floors and use painter's tape to cover electrical outlets and light switches. Safety first.
Next is the most important move: identifying your wallpaper. The "corner pull test" is a professional's go-to method. Just slide a putty knife under a corner or seam and gently try to lift it. This simple test tells you if you have strippable, peelable, or traditional paper, shaping your entire plan.
Expert Insight: Getting this first step right is the difference between a one-day project and a week-long headache. Don't skip straight to scraping.
This quick decision tree shows how the wallpaper's adhesion level determines the best removal method and the time it will likely take.
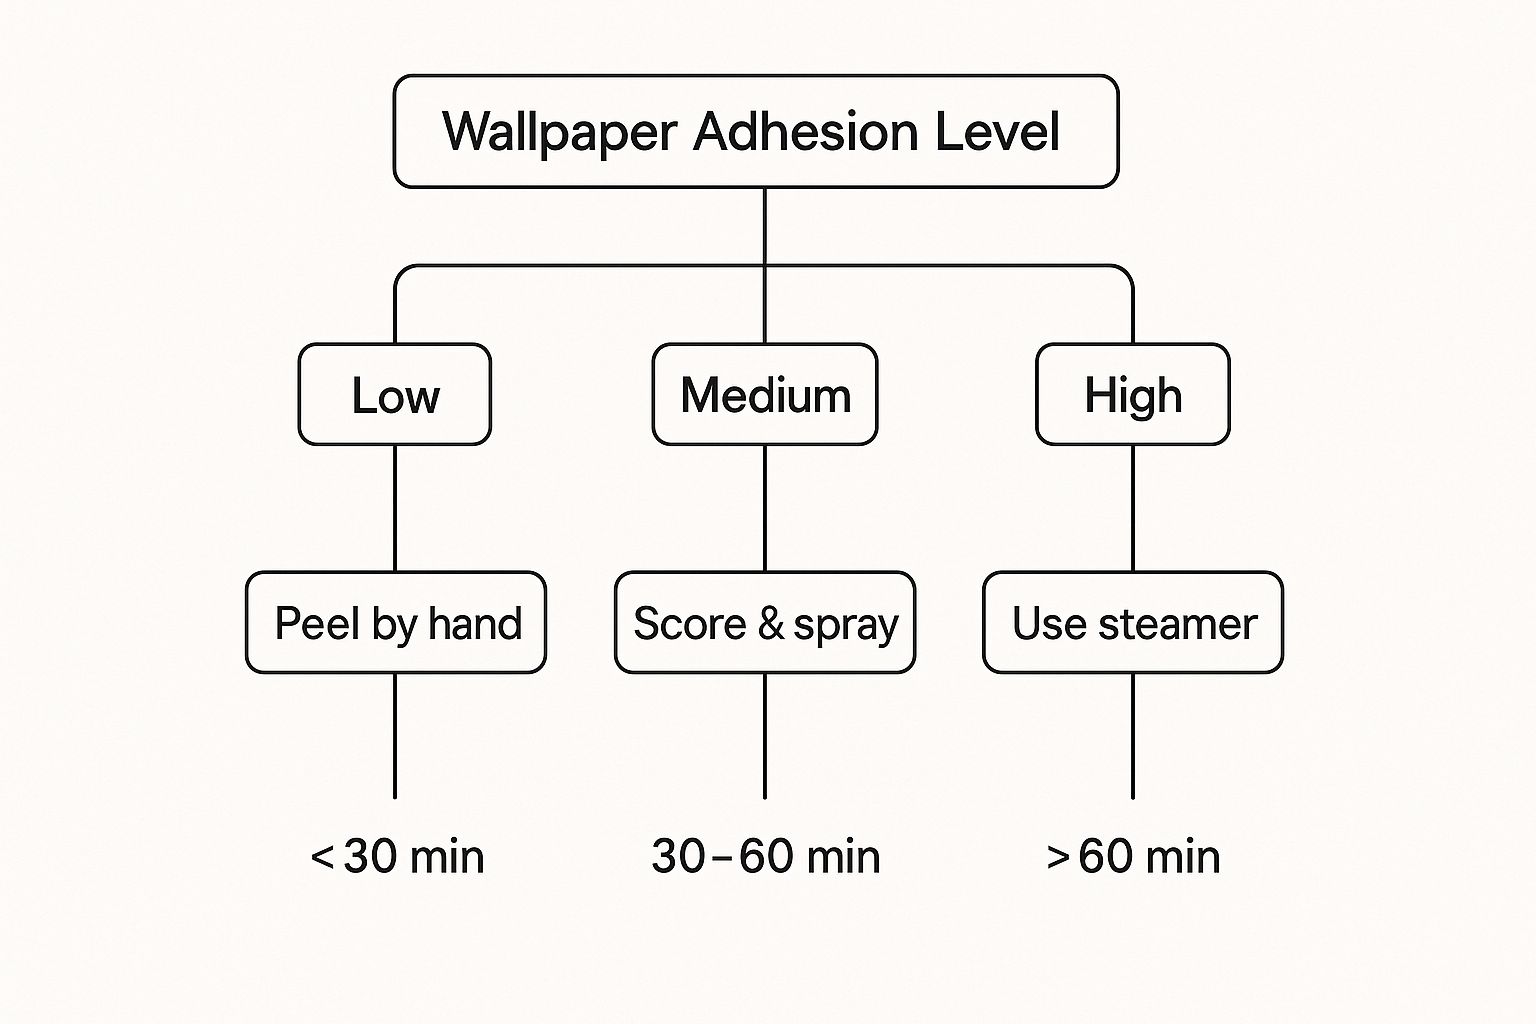
As you can see, high-adhesion papers are almost always a job for a steamer if you want to be efficient. Low-adhesion types can often just be peeled off by hand.
Understanding Your Wallpaper Type
Not sure what kind of wallpaper you're up against? Use this quick guide to figure it out. Perform the simple test action and match the result to determine your wallpaper type and the best way forward.
Wallpaper Type Identification Guide
| Test Action | Result | Wallpaper Type | Recommended Next Step |
|---|---|---|---|
| Pull a corner | Paper and backing come off easily in a full sheet. | Strippable | Keep pulling! No special tools needed. |
| Pull a corner | Only the top decorative layer peels off, leaving a paper backing. | Peelable | Peel off the top layer, then soak or steam the backing. |
| Pull a corner | Paper tears into tiny pieces and won't lift. | Traditional / Old | Score the surface, then use a liquid remover or steamer. |
This simple test prevents you from making the job harder than it needs to be. Now you know exactly where to start.
While modern 'strippable' wallpapers are convenient, they only make up an estimated 15-25% of existing installations. This means that 75-85% of the time, you'll need to get the paper wet with a remover or a steamer. Trying to scrape it dry can easily double your work time and risks gouging the wall, which can increase repair costs by 30-50%.
Once all the paper is down and the wall is clean, proper prep is key for a beautiful new finish. For a complete walkthrough, check out our guide on how to clean walls before painting.
Choosing the Right Wallpaper Removal Method
Alright, your room is prepped and ready to go. Now comes the real decision: how are you going to get that old wallpaper off the wall? The two go-to methods that deliver the best results are a liquid stripper solution or a wallpaper steamer. The right choice depends on the wallpaper’s age, material, and how stubbornly it’s clinging to the wall.
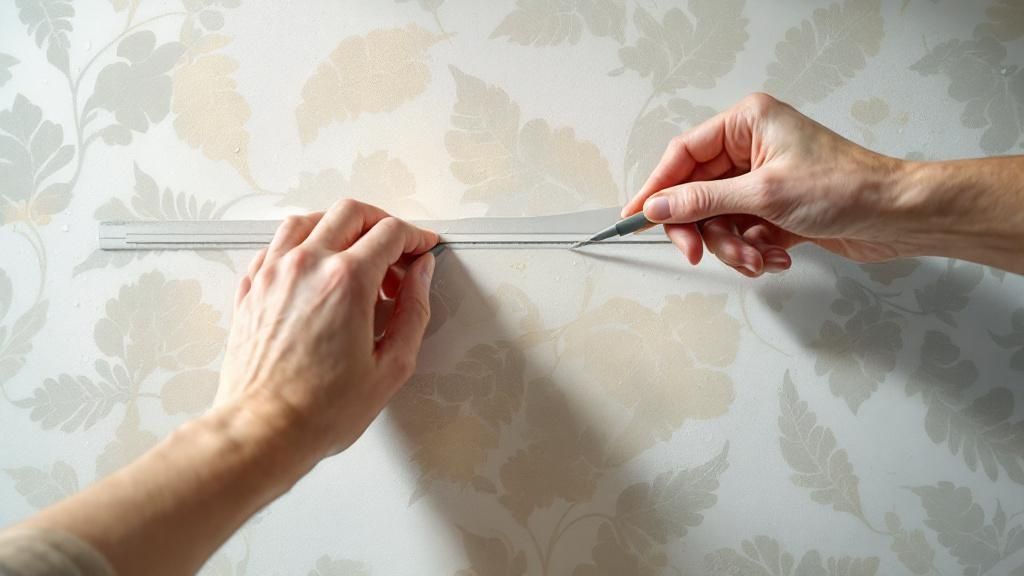
For newer wallpapers, a liquid solution is often all you need. The trick is to gently score the surface first. This creates tiny holes that let the liquid seep through and break down the adhesive.
But if you’re up against a tougher job—say, a vinyl-papered accent wall in a Carmel condo or multiple layers in an older Pacific Grove home—a steamer is going to be your best friend.
Comparing Liquid Solutions and Steamers
So, chemical stripper or steamer? It’s a classic DIY dilemma that boils down to a balance of cost, effort, and speed. Each has its place.
-
Liquid Stripper Solution: This is the budget-friendly route and a great starting point for most DIYers. You score the wall, spray the solution, let it work, and then scrape. It’s effective, but be prepared for some mess and a bit more elbow grease.
-
Wallpaper Steamer: While you’ll have to rent or buy a machine, a steamer uses hot water to melt the adhesive. This makes it a much faster and more effective weapon against stubborn papers. It’s the method we professionals turn to when dealing with painted-over or multi-layered wallpaper.
A tried-and-true approach is to score the surface before hitting it with a chemical stripper or steam. Scoring allows the solution or steam to penetrate, but you need to be patient. It can take 20 to 30 minutes for the adhesive to soften. If you're dealing with multiple layers, that time can easily double. This is where a steamer really shines, often reducing your total effort by at least 40%. You can discover more insights on this removal method from This Old House.
No matter which method you pick, the goal is to work smarter, not harder. When you use your scoring tool, apply just enough pressure to break the wallpaper's surface without digging into the drywall. Getting this prep step right is the secret to making either a liquid solution or a steamer work as efficiently as possible.
Handling Tricky Situations Like a Pro
Let's be honest, not every wallpaper removal job goes smoothly. I’ve seen my fair share of projects that start simple but quickly hit a roadblock. Knowing how to remove wallpaper easily, even when things get tough, is what separates a weekend-long headache from a job well done.
One of the most common issues we run into in older Monterey homes is wallpaper that’s been painted over. This creates a seal over the paper, forming a moisture-proof barrier that stops any liquid remover or steam from reaching the adhesive.
Tackling Painted-Over Wallpaper
When you're up against a painted-over wall, you have to get more assertive with your scoring tool. The goal is to punch enough tiny holes through the paint and the wallpaper so your remover solution can get in and do its job.
Don't be timid, but stay in control. You need to perforate the entire surface thoroughly without digging deep enough to gouge the drywall. It's all about finding that balance between firm pressure and careful, sweeping motions.
Working with Delicate Drywall
Another scenario that requires a gentle touch is removing wallpaper from drywall. Unlike the tough old plaster you might find in a historic Carmel home, drywall has a paper facing that a scraper can tear in an instant. One clumsy move can lead to gouges and annoying repairs, delaying your interior painting in Monterey.
To keep your walls safe, you’ll need to adjust your technique:
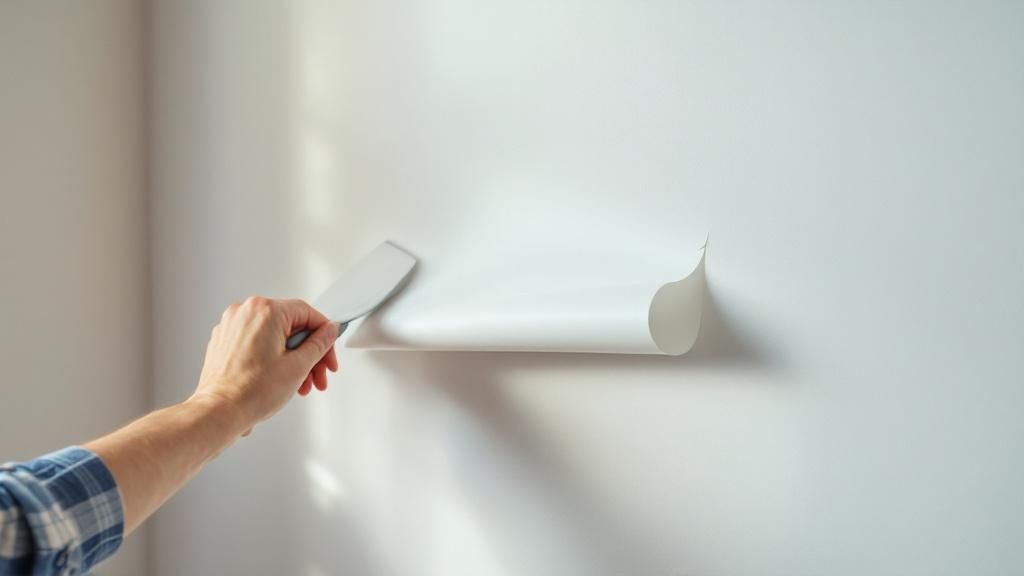
- Mind Your Angle: Hold your putty knife or scraper at a very low angle, keeping it almost parallel to the wall. This lets you slide under the wallpaper instead of digging into the drywall.
- Patience is Key: Give your removal solution or steam plenty of time to work. When the adhesive is fully dissolved, the paper will practically fall off with minimal effort.
- Don't Force It: If you hit a stubborn spot, stop. The temptation is to just scrape harder, but that's how damage happens. Instead, re-wet the area, give it a few more minutes, and then try again.
Taking a measured, careful approach is the secret to getting even the most stubborn wallpaper off without damaging your drywall. This step is non-negotiable if you want a smooth, perfect surface that’s ready for a fresh coat of paint.
Why Is Old Wallpaper So Hard to Remove?
If you’ve tried to strip wallpaper from an older home, like one of the classic gems in Pacific Grove, you know it can feel fused to the wall. But then you see a modern print peel off in a single sheet. What gives?
The answer is all about how wallpaper and its adhesives have evolved. Understanding this history is key to figuring out how to remove wallpaper easily, because there’s no one-size-fits-all method that works for everything.
The headache with older wallpapers comes down to the materials. We’re talking about thick, sometimes cloth-like papers applied with incredibly strong, primitive glues. These were meant to last a lifetime, and removal was never part of the equation.
From Hand-Printed Heirlooms to Machine-Made Modernity
The shift in wallpaper production over the years directly impacts how much of a fight it’s going to put up today. In the 19th century, machine printing made wallpaper accessible, but it also led to a wild west of different materials and adhesives.
- Early hand-printed papers often need a ton of soaking and patient scraping.
- Modern vinyl or peel-and-stick versions are literally engineered for easy removal.
This is exactly why knowing your home’s age is your secret weapon. For a deeper dive, you can learn more about the history of wallpaper production to better understand what you might be up against.
A Pro Tip From Experience: If your home was built before the 1980s, assume the wallpaper will be stubborn. The adhesives from that era were notoriously aggressive and often applied right over unprimed drywall. That combination makes removal a very delicate operation.
Thinking about it this way helps you appreciate why all the new tools and solutions exist. They were specifically invented to solve the problems those old, permanent materials created.
Achieving a Flawless Finish for New Paint
Getting the paper off the wall is a huge victory, but the job isn't finished. What you do next is what separates a decent paint job from a professional one. Many people skip this final prep stage, a mistake that can ruin all their hard work.
Old wallpaper adhesive is notorious for causing problems. If even a tiny bit of sticky residue is left behind, it can react with the moisture in fresh paint. The result is bubbling, cracking, or peeling paint—a frustrating and costly do-over that’s entirely avoidable.
Cleaning and Repairing Your Walls
A quick wipe-down with a wet rag won't cut it. You must be certain every trace of glue is gone. Here’s a quick test: wet a small section of the wall with a sponge and wait a minute. If it feels slick or slimy, you still have adhesive to remove.
To get it off, mix a solution of TSP substitute or even just white vinegar and warm water. Grab a sponge and scrub the walls until they feel completely clean and are no longer tacky.
Once the walls are clean and dry, it’s time for a thorough inspection. Get up close and look for any nicks, gouges, or holes that might have happened during removal.
Expert Tip: Even the tiniest imperfections will stick out like a sore thumb under a fresh coat of paint, especially if you're using a satin or semi-gloss finish. Taking the time to patch and sand everything smooth now is crucial for that high-end result you're after.
After you've identified all the problem spots, you can get to patching. For a detailed guide, our article on professional drywall preparation for painting covers everything from choosing spackle to feathering out your patches like a pro.
Post-Removal Wall Prep Checklist
Follow this checklist to ensure your walls are perfectly clean, smooth, and ready for priming and painting. It’s the final step to guarantee your new paint looks amazing and lasts for years.
| Task | Action Required | Why It Matters |
|---|---|---|
| Final Cleaning | Scrub walls with a TSP or vinegar solution. Rinse with clean water and let dry completely. | Removes all lingering adhesive that can cause paint to fail. |
| Damage Repair | Fill any holes, nicks, or gouges with spackling compound. | Creates a perfectly smooth surface; paint highlights imperfections. |
| Sanding | Once dry, sand all patched areas flush with the wall using fine-grit sandpaper. | Ensures patches are invisible under the new paint. |
| Dust Removal | Wipe down the entire wall with a tack cloth or a damp sponge to remove all sanding dust. | Prevents dust from mixing with primer, which causes a gritty texture. |
| Priming | Apply one even coat of a high-quality, stain-blocking primer to the entire wall. | Seals patched areas, blocks stains, and ensures even paint absorption for a uniform color. |
With these steps completed, your walls are officially ready for a new beginning. That final, non-negotiable coat of primer seals the surface, blocks potential stains, and gives your new paint color the perfect base to look even and beautiful for years to come.
Frequently Asked Questions
We get many questions from clients in the Monterey area about taking down old wallpaper. Here are the most common queries with answers from our years of experience in home renovation.
1. What's the easiest way to remove wallpaper?
The easiest method depends on your wallpaper. For modern strippable paper, you can simply peel it off by hand. For most other types, using a wallpaper steamer after scoring the surface is the most efficient and least labor-intensive approach.
2. Can I just paint over wallpaper?
We strongly advise against it. Paint moisture can reactivate the old adhesive, causing bubbles and peeling. Additionally, the wallpaper seams and texture will show through, resulting in a poor-quality finish. Proper removal is always the best option for a professional result.
3. How do I know when all the wallpaper glue is gone?
Here’s our go-to test: wet a small section of the wall with a clean sponge. Wait one minute, then touch it. If it feels at all slimy or tacky, adhesive residue remains. Continue washing with a TSP substitute or a vinegar-water solution until the wall is completely clean to the touch.
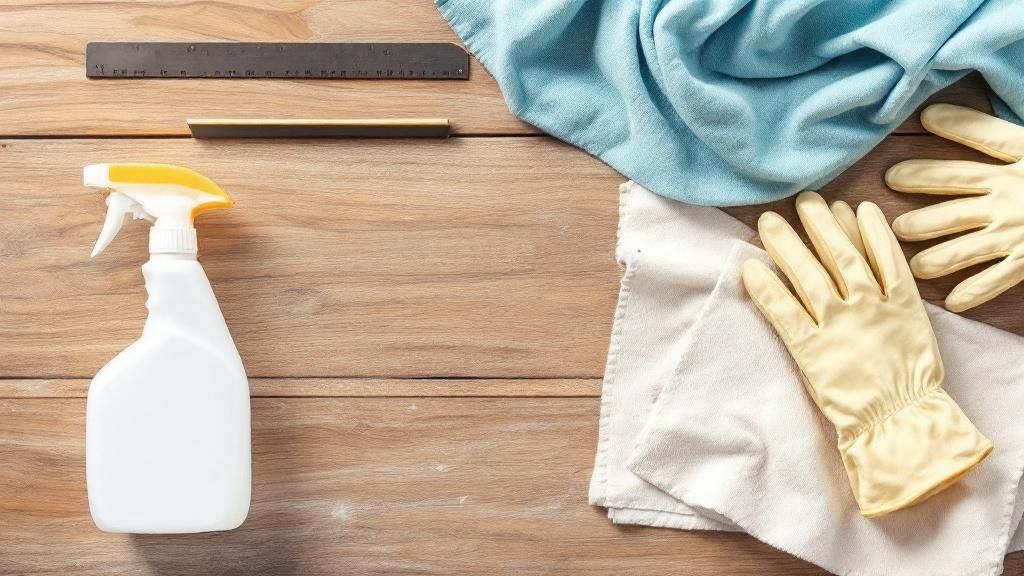
4. What tools are essential for wallpaper removal?
At a minimum, you'll need a scoring tool, a putty knife or wallpaper scraper, drop cloths and painter’s tape for protection, and safety gear like gloves. You will also need either a liquid removal solvent and spray bottle or, for tougher jobs, a wallpaper steamer.
5. When should I hire a professional for wallpaper removal?
Consider calling a professional for your Salinas home renovation if you encounter:
- Multiple layers of old wallpaper.
- Wallpaper that has been painted over.
- Delicate surfaces like historic plaster or damaged drywall.
- If you simply want to ensure a perfect, damage-free result without the hassle.
If your wallpaper removal project in Monterey, Carmel, or Salinas is becoming more than you bargained for, don't risk damaging your walls. The experts at Legacy Painting & Renovating Inc. can handle the entire process for you—from clean, safe removal to flawless wall prep and a beautiful new paint job.
Contact us today for a free, no-obligation estimate and let us help you create a space you’ll love. Visit us at https://legacypaintingrenovating.com.