Are you tired of flat, boring walls? Textured wall painting techniques use special tools and methods to create a beautiful, three-dimensional finish. This guide will show you how to add depth, character, and visual interest to your space. It’s a great way to go beyond a standard paint job and give your home a unique personality.
This guide explores popular textured wall painting techniques, from simple sponging to modern trowel methods, helping you choose the right style for your Monterey home.
Why Add Texture to Your Walls?
Moving beyond flat paint can transform a room. Texture adds a layer of warmth and style you can't get otherwise. Textured walls play with light to create shadows and highlights that make a space feel alive.
This effect can make a room feel cozier or more interesting. One of the best perks of texture is its ability to hide minor wall flaws. For anyone with an older home in areas like Monterey or Salinas, this is a game-changer. Small cracks and bumps vanish under a textured finish.
Adding Personality and Style
Textured wall painting lets you put your personal stamp on your walls. The possibilities are diverse, allowing you to create a look that is 100% you.
- Subtle and Elegant: Techniques like sponging or rag rolling create a soft, mottled look that adds gentle movement.
- Bold and Dramatic: Methods like a skip trowel or knockdown finish offer a rustic or modern feel that can be a stunning focal point.
- Luxurious and Polished: Finishes like Venetian plaster give a smooth, marble-like appearance for high-end elegance.
This is not a new trend. The desire to add dimension to walls goes back centuries. A unique method from mid-18th century Tibet involved applying pigments over Tibetan paper glued to the wall. This shows how deep the roots of textured painting really are.
Key Takeaway: Texture isn't just about looks. It's a smart solution for imperfect walls and a powerful design tool to reflect your personal style.
Whether you want a cozy Mediterranean vibe for your Carmel home or a modern feel in a Pacific Grove condo, there's a texture for you. Our guide to professional residential interior painting can help you decide which finish is right for your space.
Gathering Your Texture Painting Supplies
Starting a project in the Monterey area with the right gear is key to a professional result. This is especially true when tackling textured walls. Having everything ready saves you from trips to the hardware store.
Think of it as setting the stage for success. You need specific tools to create the exact textured look you imagine for your walls.
Essential Preparation and Safety Gear
Before you start, you must protect your space and yourself. A clean outcome is built on great prep work. For a deep dive, see our guide on proper surface preparation for painting. Your basic prep kit should include:
- Drop Cloths: Use canvas or heavy plastic to cover floors and furniture.
- Painter's Tape: Apply this along trim, baseboards, and ceilings for crisp lines.
- Safety Glasses and Gloves: Protect your eyes from splashes and keep your hands clean.
- Dust Mask: A mask is crucial if you're sanding or mixing dry compounds.
Choosing Your Texture Medium
The "texture" comes from a specific material. Your choice depends on the look you want, your budget, and how hands-on you want to get. Here’s a quick comparison of common choices we see in homes from Carmel to Pacific Grove.
| Medium | Best For | Application Tools | Skill Level |
|---|---|---|---|
| Pre-Mixed Texture Paint | Subtle finishes like sand or stone | Standard or specialty rollers | Beginner |
| Paint Additives | Creating custom texture in any latex paint | Standard rollers, brushes | Beginner |
| Joint Compound (Mud) | Dramatic, custom looks like skip trowel | Trowels, putty knives, sponges | Intermediate |
The right medium makes achieving your desired finish easier. Choose one that aligns with your vision and comfort level.
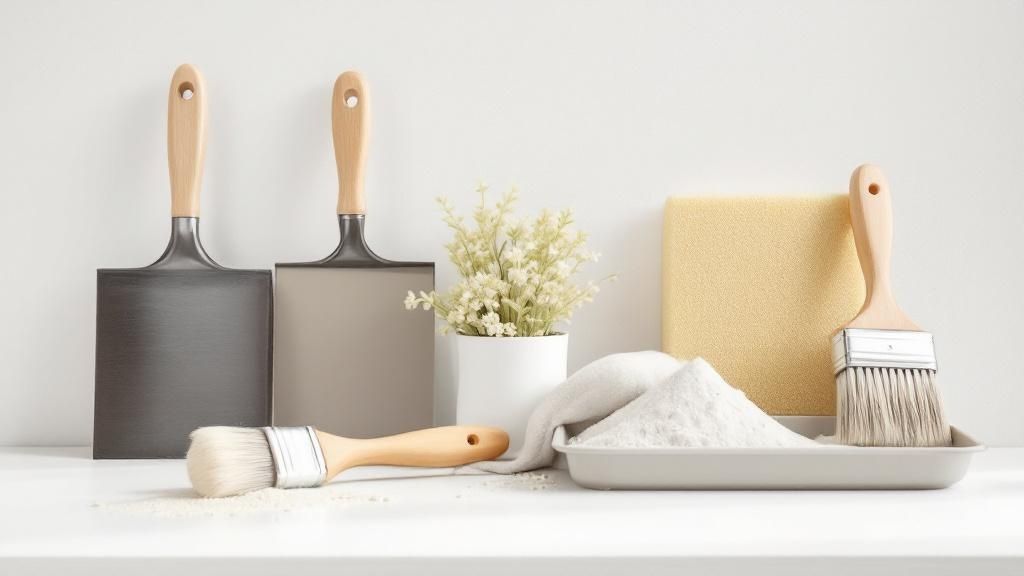
Specialty Tools for Application
This is where the magic happens. For most textured finishes, standard rollers won't cut it. You'll need specialized tools designed for specific effects.
Pro Tip: Don't skimp on quality tools. A good trowel or specialty roller makes the process smoother and gives you a more uniform finish.
Here are a few application tools to consider:
- Specialty Texture Rollers: These have unique surfaces that create cool finishes with minimal effort.
- Trowels and Putty Knives: A flexible steel trowel is key for techniques like skip trowel. Different sizes help you work efficiently.
- Natural Sea Sponges: A natural sea sponge is a must for a classic sponged look. It creates an organic, random pattern.
- Rags: For rag rolling, use a lint-free material like cheesecloth or linen for different patterns.
Having these items ready ensures your project goes smoothly. You can turn your vision into a beautiful, textured reality.
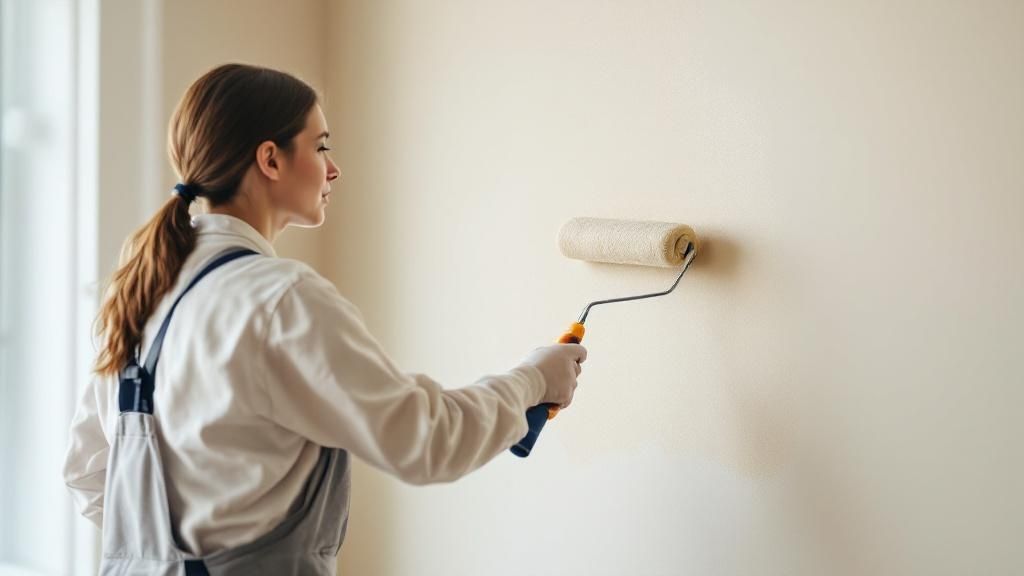
Applying Simple Rag Rolling and Sponging Finishes
Ready to try textured wall painting? Rag rolling and sponging are great for beginners. They are forgiving, don't need expensive tools, and let you create a custom look for any room in your Monterey home.
The magic is layering a semi-transparent glaze over a solid base coat. This creates a soft, mottled effect with depth. Always practice on a piece of cardboard first to get a feel for the motion.
Mastering the Art of Rag Rolling
Rag rolling is a classic technique. It uses a bundled rag to apply or lift off a colored glaze. The fabric you choose determines the final pattern. A soft fabric like cheesecloth gives a delicate finish, while burlap creates a bolder pattern.
There are two main ways to do it:
- Additive Rag Rolling: Dip the rag in glaze and roll or press it onto the wall.
- Subtractive Rag Rolling: Apply glaze with a roller, then use a clean rag to lift it off, letting the base coat show through.
Pro Tip: Keep the pattern random by changing your hand's direction. Re-bunch the rag often to avoid a repetitive, stamped look.
The Sponging Technique for a Natural Look
Sponging is another approachable method. It can mimic anything from aged plaster to soft suede. A natural sea sponge creates a beautiful random pattern. A synthetic sponge gives a more uniform texture.
You can use an additive ("sponging on") or subtractive ("sponging off") approach. "Sponging on" is easier for beginners. Dip a damp sponge in glaze, blot the excess, and press it onto the wall with a light dabbing motion.
Before texturing, your wall prep must be perfect. Our guide on how to prepare walls for painting covers the crucial steps for a flawless base.
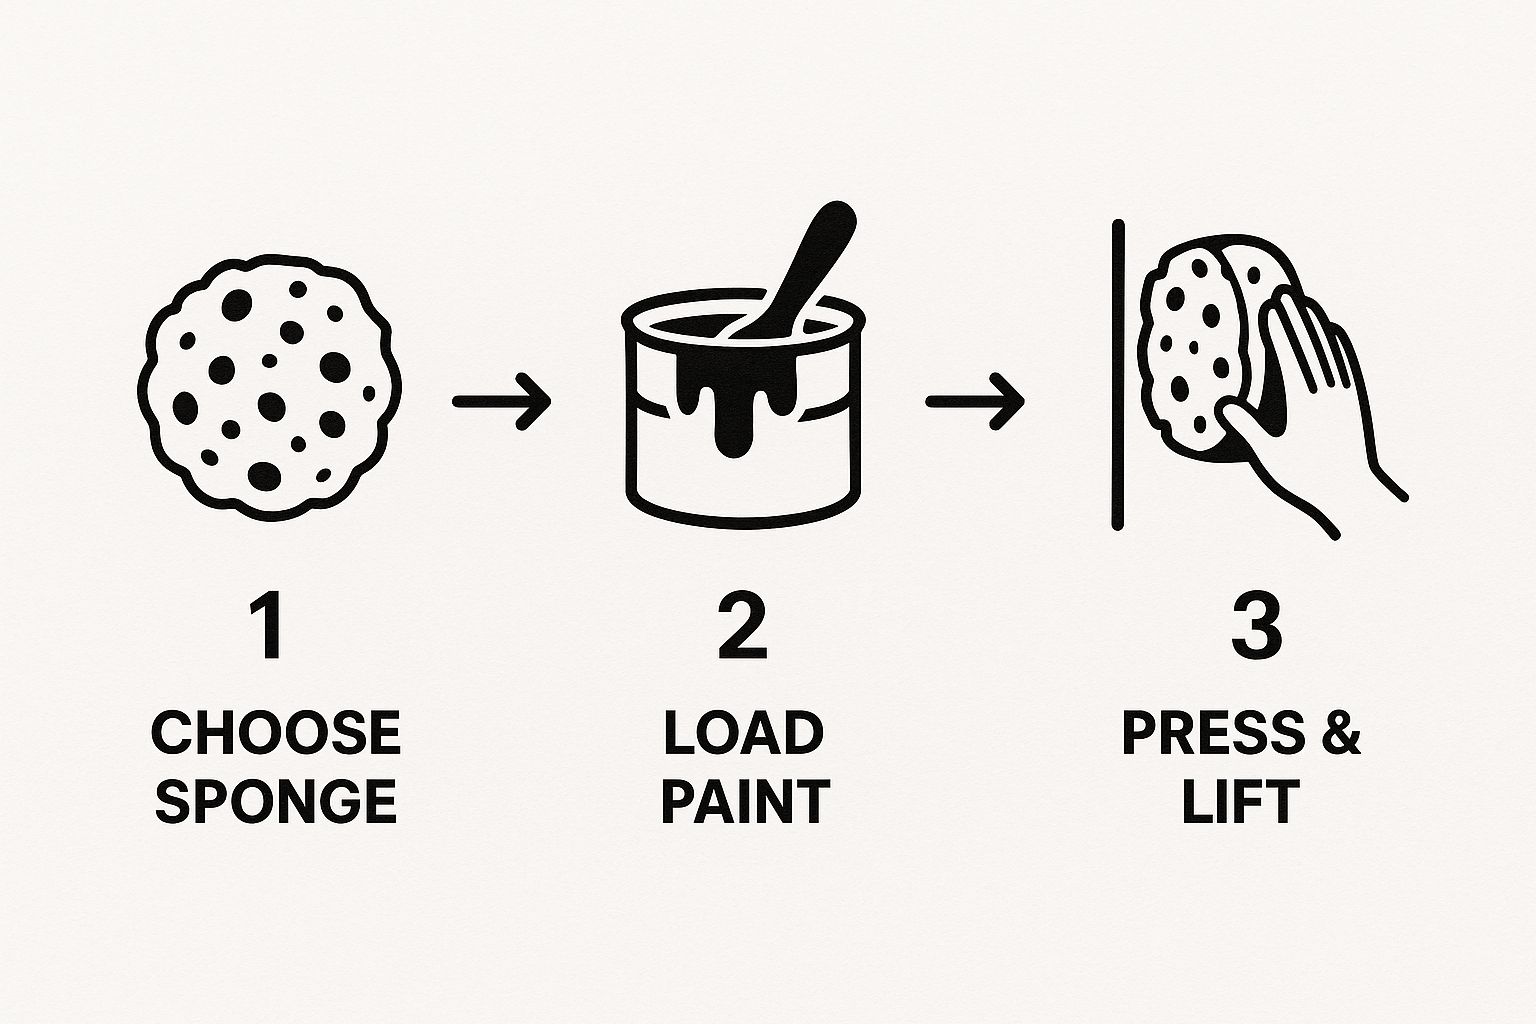
Success with sponging comes down to a simple motion. Choose your sponge, load it with a little paint, and use a gentle press-and-lift technique across the wall.
Mixing Your Glaze for the Perfect Finish
The glaze is the secret sauce for both of these textured wall painting techniques. It’s a mix of paint and a clear glazing medium. This thins the paint and gives you more time to work before it dries.
A good starting ratio is four parts glaze to one part latex paint. More glaze creates a more transparent finish. Less glaze gives a more color-rich result. Always mix more glaze than you think you'll need in one big bucket to ensure consistent color across all walls in your Salinas or Carmel home.
Creating Modern Looks with Trowel Methods
If you want a finish with more substance, it's time to pick up a trowel. Trowel techniques involve applying drywall mud to build three-dimensional patterns on your wall. These methods require more patience, but the payoff is a custom finish with incredible character.
This is how you create popular modern textures that feel artistic. I've seen these finishes used in homes all over Pacific Grove and Carmel to complement their unique styles.
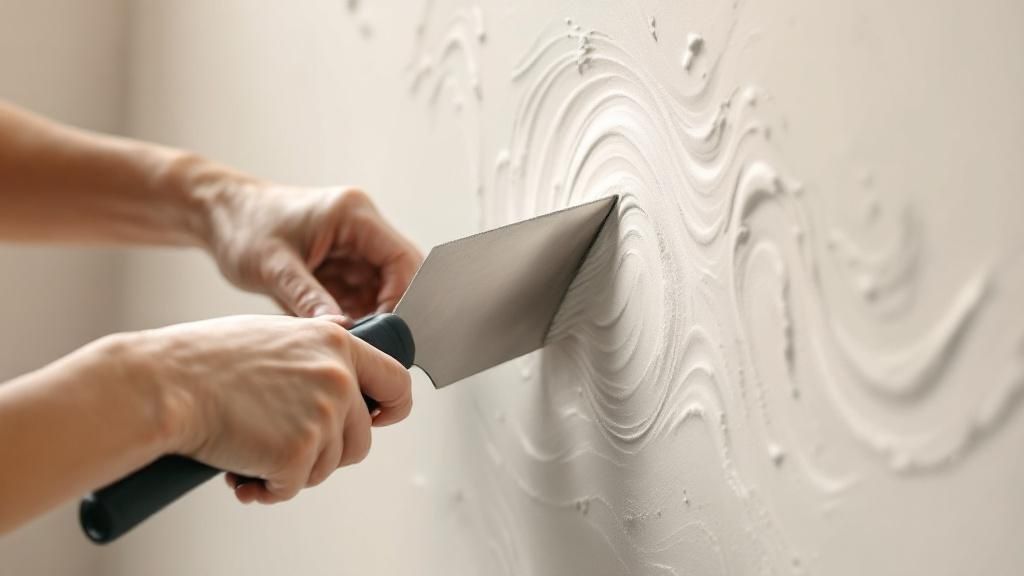
The Skip Trowel Technique
The skip trowel finish has a subtle, organic look. It creates a sparse layer of texture with low peaks and valleys. You achieve this by pulling a thin layer of joint compound across the wall with your trowel at a low angle.
The magic is in the "skipping" motion. The trowel lightly jumps across the surface, leaving random patches of mud. This creates a beautiful, imperfect pattern.
Pro Tip: Use very light pressure. Let the trowel do the work. Pressing too hard will flatten the texture and defeat the purpose.
Mastering the Knockdown Texture
Knockdown is another popular trowel finish. It has a slightly more uniform look than skip trowel. It's more pronounced than orange peel but less dramatic than old-world plaster.
The process has a few stages:
- Get the Texture On: Apply thinned-down joint compound. A hopper gun sprayer is the pro's choice, but you can do it by hand with a roller or trowel.
- Let It Set Up: Wait for the wet peaks to firm up, usually 15 to 30 minutes. The texture should be stiff but still pliable.
- Knock It Down: Gently glide a wide knockdown knife over the surface. This flattens the peaks, creating the signature mottled pattern.
The result is a warm, inviting surface perfect for a family home in Salinas or a coastal retreat in Monterey.
A Timeless Tradition of Textured Walls
Using trowels and plaster has deep historical roots. In Roman antiquity, fresco painting involved applying pigment to wet plaster, making the color part of the wall. You can explore more about the longevity of textured wall finishes.
Keys to a Successful Trowel Finish
Getting a professional trowel finish comes down to a few things. Above all, consistency is king. You have to maintain the same trowel angle, pressure, and mud thickness across the entire wall.
Here are a few more tips:
- Mix Your Mud Correctly: Make sure your joint compound is smooth and lump-free. A consistency like thick pancake batter is ideal.
- Work in Small Sections: Work in manageable 4×4 feet sections to ensure the texture doesn't dry out.
- Angle Matters: A low angle is needed for a skip trowel. A slightly higher angle helps smooth and flatten the material.
While these textured wall painting techniques demand more skill, the stunning result is worth the effort. They create a finish that feels custom and connected to a home’s character.
Common Painting Mistakes and How to Avoid Them
Even the best textured wall painting techniques can fail if you make common mistakes. A stunning texture requires skillful application and knowing what errors to avoid in your Monterey home. Knowing what not to do is just as important as knowing what to do.
Applying Texture Too Thick or Too Thin
Getting the material consistency wrong is a frequent slip-up. Applying texture too thickly can cause it to crack as it dries. A super-thick application also makes it hard to create a subtle pattern.
Going too thin is just as bad. A skimpy layer won't give you enough depth, leaving a patchy look. The goal is a sweet spot—thick enough to work with but thin enough to dry properly.
Expert Tip: I always tell people to mix their texture material to the consistency of thick pancake batter. This is generally the sweet spot for most techniques.
Skipping Critical Drying Times
Patience is key, especially with textures. Each layer—primer, texture, and paint—must be completely dry before you move on. Rushing this can lead to disaster.
Painting over wet texture can cause it to smear and lose its shape. It can also trap moisture against the wall, leading to paint bubbles later.
Choosing the Wrong Paint Sheen
The final paint sheen can make or break your texture. High-gloss paint reflects a lot of light, which highlights imperfections instead of the pattern.
A matte or eggshell finish is usually your best bet. These low-sheen paints absorb light, letting the natural shadows of your texture stand out.
Creating Obvious, Repetitive Patterns
Most textured finishes should look organic. A repetitive pattern is a dead giveaway of an amateur job. This happens when you use the same motion over and over.
To avoid this, mix things up:
- Rotate your wrist: Constantly change the angle of your tool.
- Vary your pressure: Use a combination of lighter and firmer touches.
- Step back frequently: Pause and look at the wall from a distance to ensure the pattern feels balanced.
Frequently Asked Questions (FAQs)
Here are answers to some of the most common questions we hear from homeowners around Monterey, Carmel, and Salinas about wall texturing.
1. Can I apply new texture over an existing textured wall?
Yes, but prep work is key. For a light existing texture like orange peel, clean the wall and apply a quality primer. For heavier patterns, you may need to remove the old texture or apply a "skim coat" of joint compound to create a smooth surface first.
2. What is the easiest wall texture for a beginner?
Sponging and rag rolling are fantastic places to start. These methods are forgiving and don’t require expensive tools. They give you control and make it easy to fix mistakes.
3. How do I fix a mistake when applying texture?
If the texture is still wet, scrape it off with a putty knife and reapply. If it has dried, sand the mistake smooth, wipe away the dust, spot-prime the patch, and then reapply your texture, blending the edges.
4. How long does it take for wall texture to dry?
Drying time varies based on thickness, texture type, and humidity. Thin glazes for sponging may feel dry in a few hours. Heavier trowel-on textures can take a full 24 to 48 hours to cure completely. Always wait until the texture is bone dry before priming or painting.
5. Is wall texture a good idea for bathrooms or kitchens?
Yes, but use the right materials. Avoid heavy, coarse textures that can trap moisture. Stick with a subtle texture and finish with a high-quality, moisture-resistant paint like a satin or semi-gloss sheen. Good ventilation is also a must.
For a deeper dive into the painting process, our guide on how to paint a room for beginners has valuable insights.
Ready to transform your walls but want a professional touch? Contact Legacy Painting & Renovating Inc. today for a free consultation and estimate for your home in Salinas, Monterey, or the surrounding areas.